Helmets
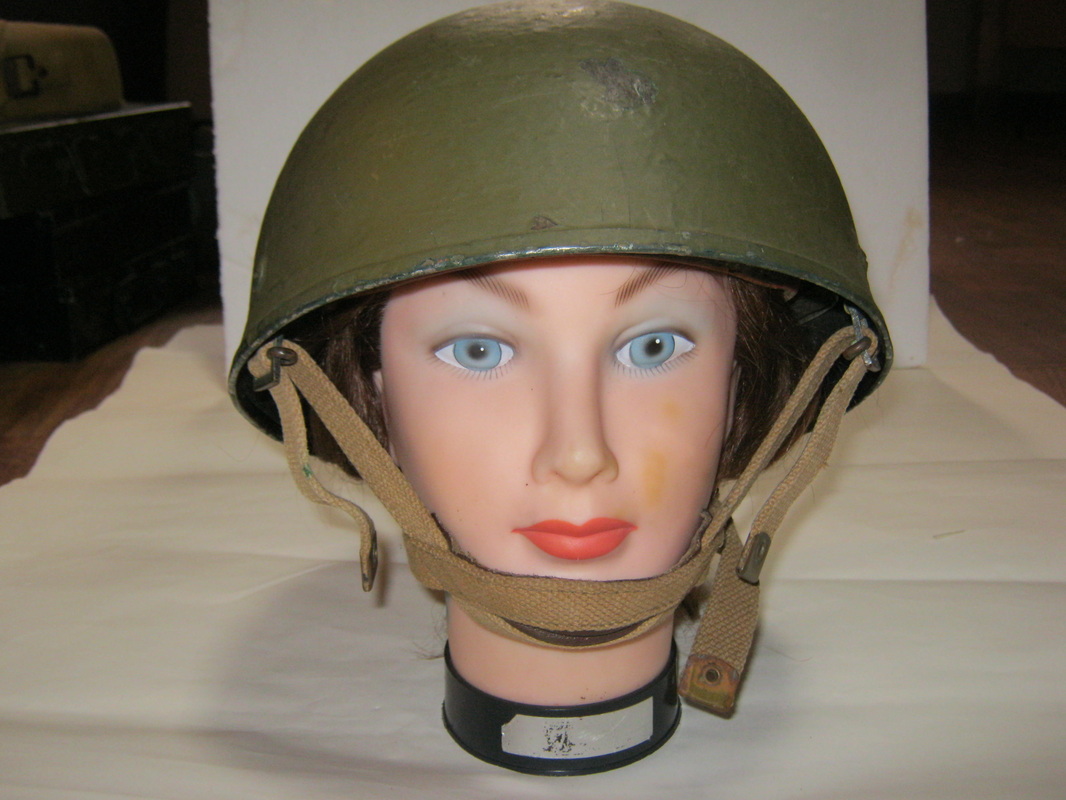
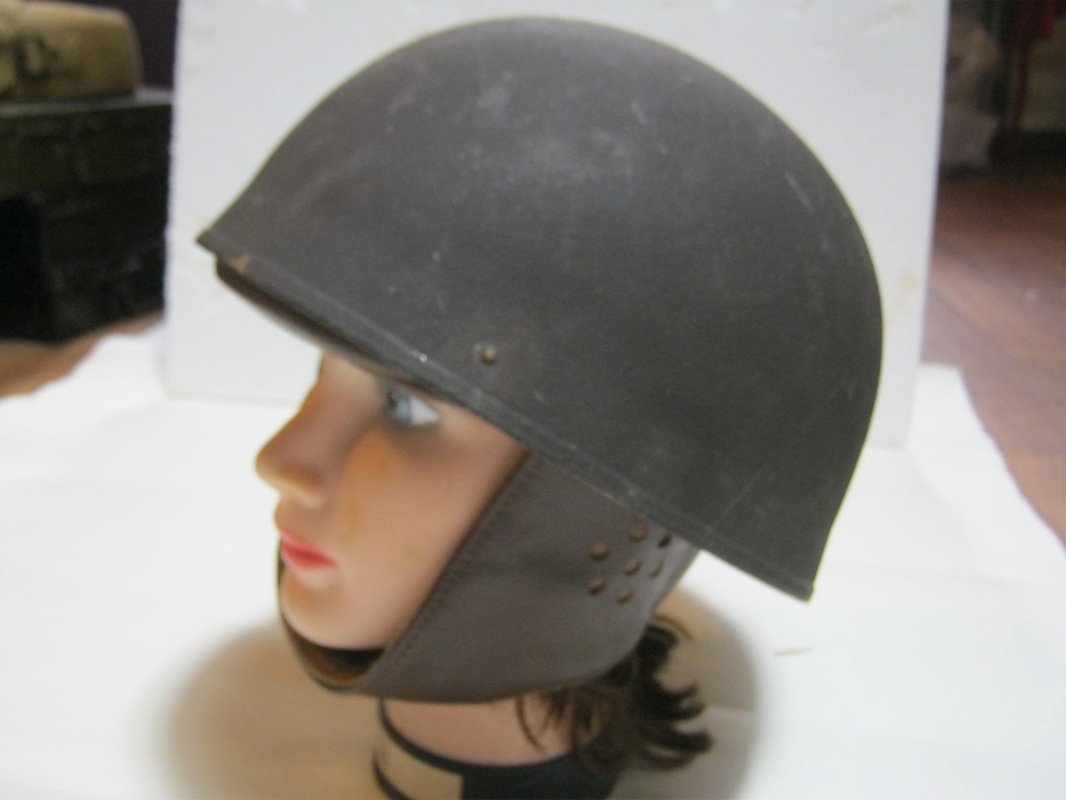
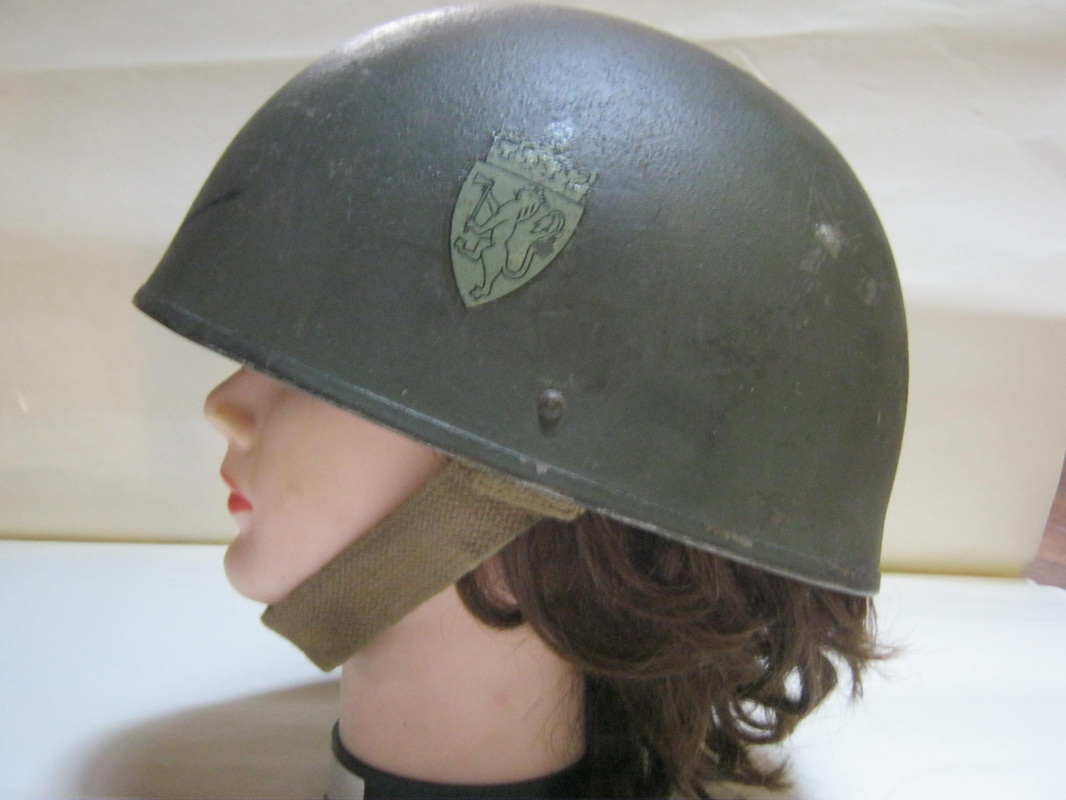
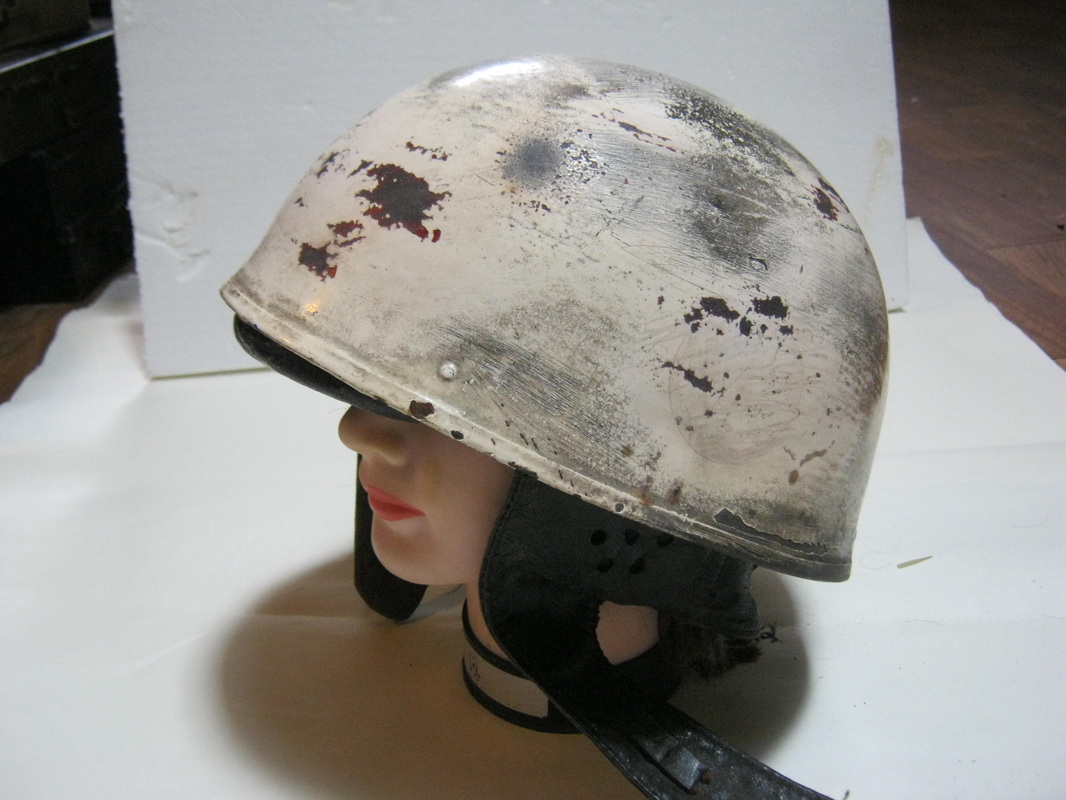
There were three types of helmets worn in the 6th AARR. The standard airborne helmet, the Royal Armoured Corps tank helmet, and the dispatch rider helmet for motorcycle couriers. The below left helmet is the airborne helmet for parachutists and glider troops, with the later war web chin and neck strap. Below center is the dispatch riders' helmet, with leather neck and head harness. Below right is the tanker helmet. This particular helmet is post-war Belgian, exact in detail to the wartime british. This is shown so that you can know, if you find one, they're much cheaper than wartime british helmets, and you simply removed the belgian decal with model decal solvent or scrape it off. Scroll further below for more details of these helmets and information for conversions.
|
|
|
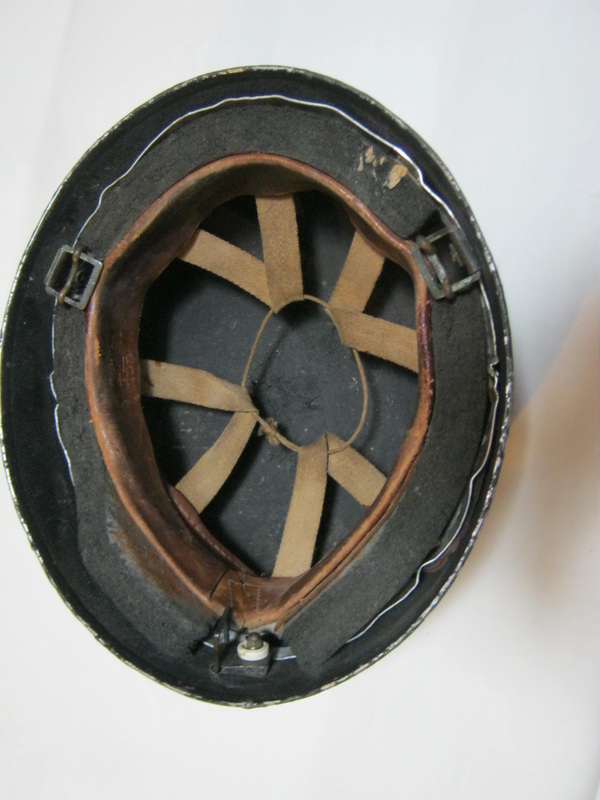
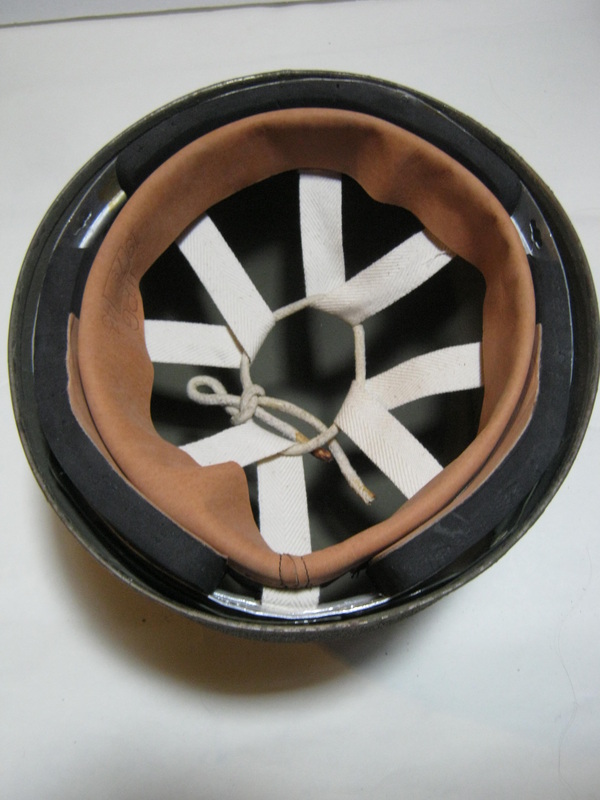
Below left is the interior detail of the airborne helmet, with chin strap removed. The dispatch rider helmet is center, and the tanker helmet at right. The shell is the same basic shell for all three helmets. The differences are the manner of liners, suspension and chin strap or harness arrangement depending on the type of use the helmet was to be put to. In relative value of original helmets of the three types, the airborne helmet is by far the most expensive, going for several hundred of dollars for one in excellent condition. The tanker helmet is next, pricing between one and two hundred dollars. The dispatch rider is least, going from about $80 to$120.00. Belgian post-war tanker helmets are sometimes found for between $50 and $100.00.
|

|
|
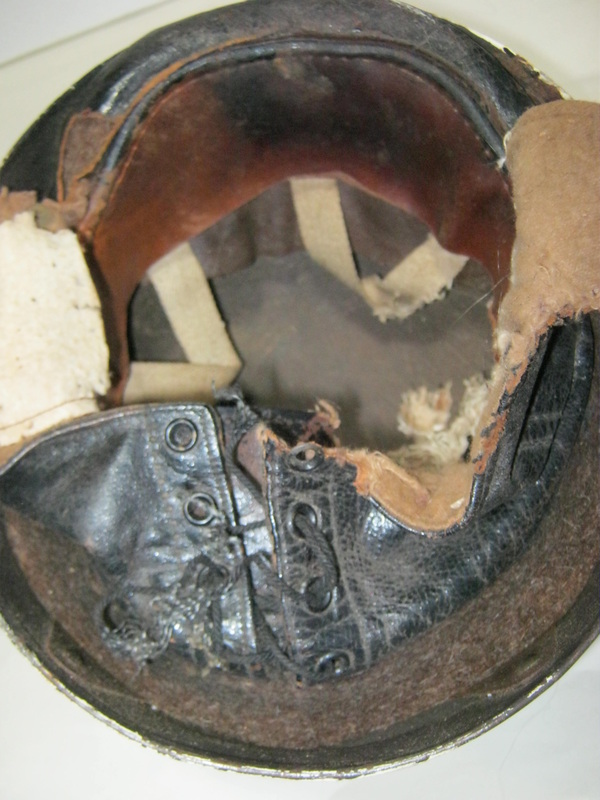
There are options for obtaining a helmet of the proper type for your job within the 6th AARR. Reproductions of the airborne helmet are available from between $80 and $150 from International Military Antiques and What Price Glory. Or you can hunt around militaria shows and on the internet for an original of any of the three types. Or you can convert one yourself for your particular function. Below is an original dispatch rider helmet found on Ebay with a sale price of $30.00 plus shipping. To the left and center is the condition of the exterior and interior of the helmet. The liner being torn and aparently the leather harness being chewed on by rodents. To the right is the helmet after removing the guts, a good cleaning, and a coat of spray paint.
|
|
|
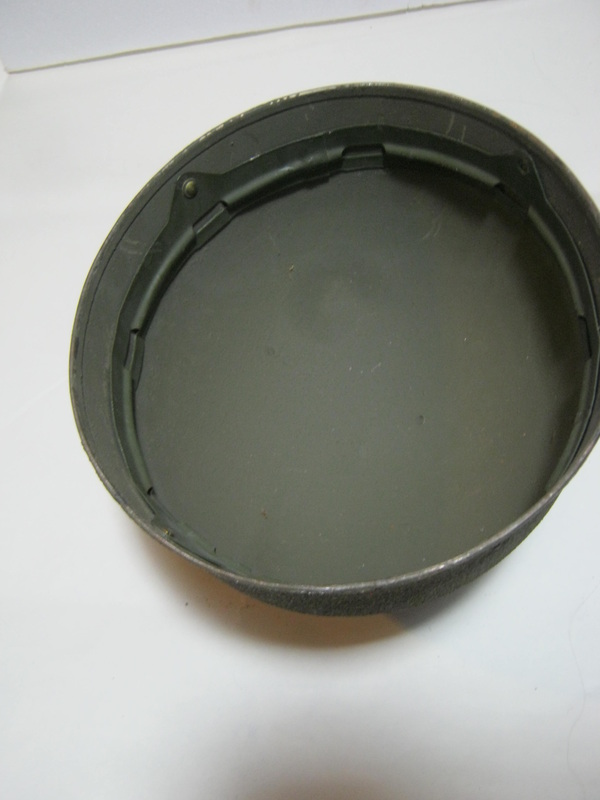
Adding a repro airborne helmet liner and leather airborne chin and neck harness from What Price Glory, shown below left and below center, turns the helmet above into an airborne helmet. The replacement in the above helmet with the brodie-type liner in the below right photo, found on ebay with an opening bid of $10.00, and a neck strap, turns the above helmet into a tanker helmet. I recently saw the proper strap on ebay with an opening bid of $4.99. And there are other sources for original and reproduction liners and chinstraps and whatnot, including reproductions of the airborne web chin straps of the type in the photo for the airborne helmet at the beginning of the helmet section above. All can be found on searches of the internet.
|
|
|
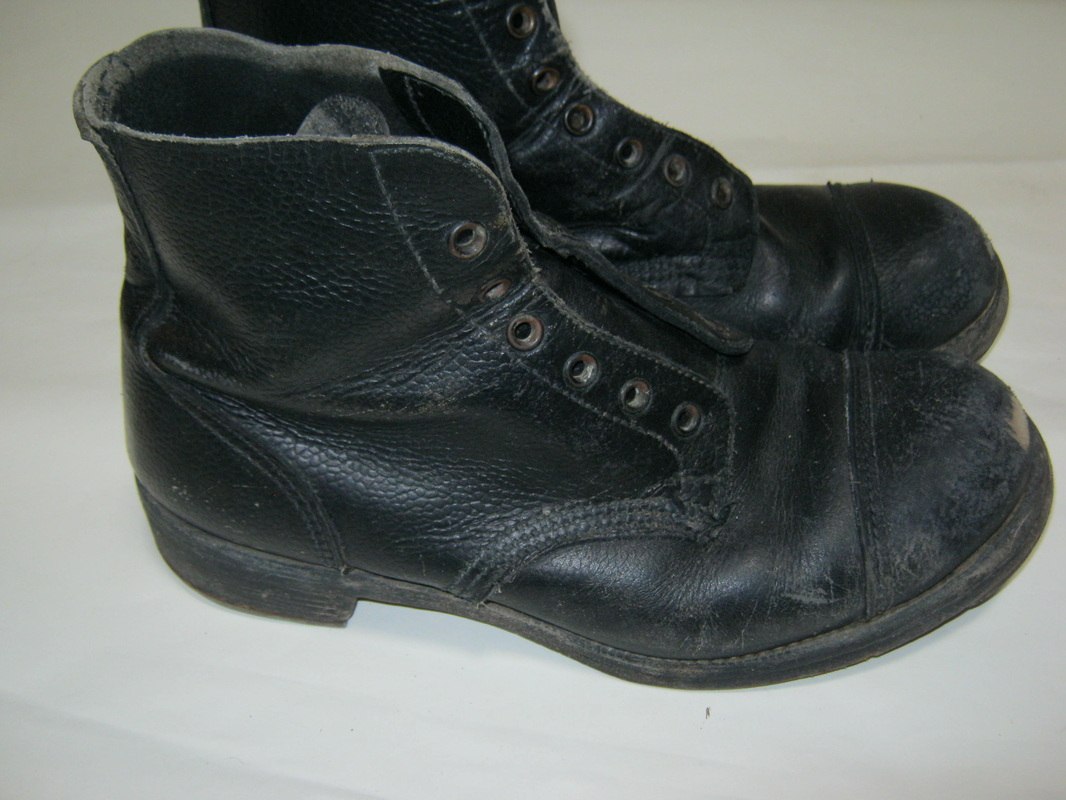
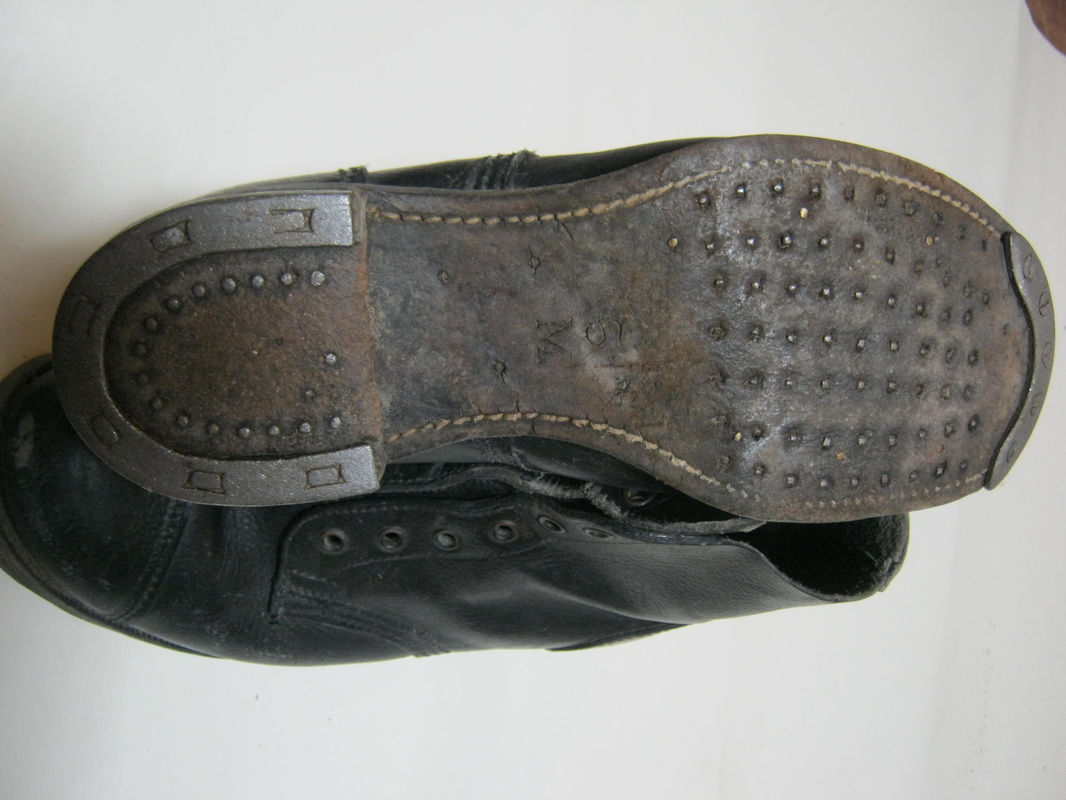
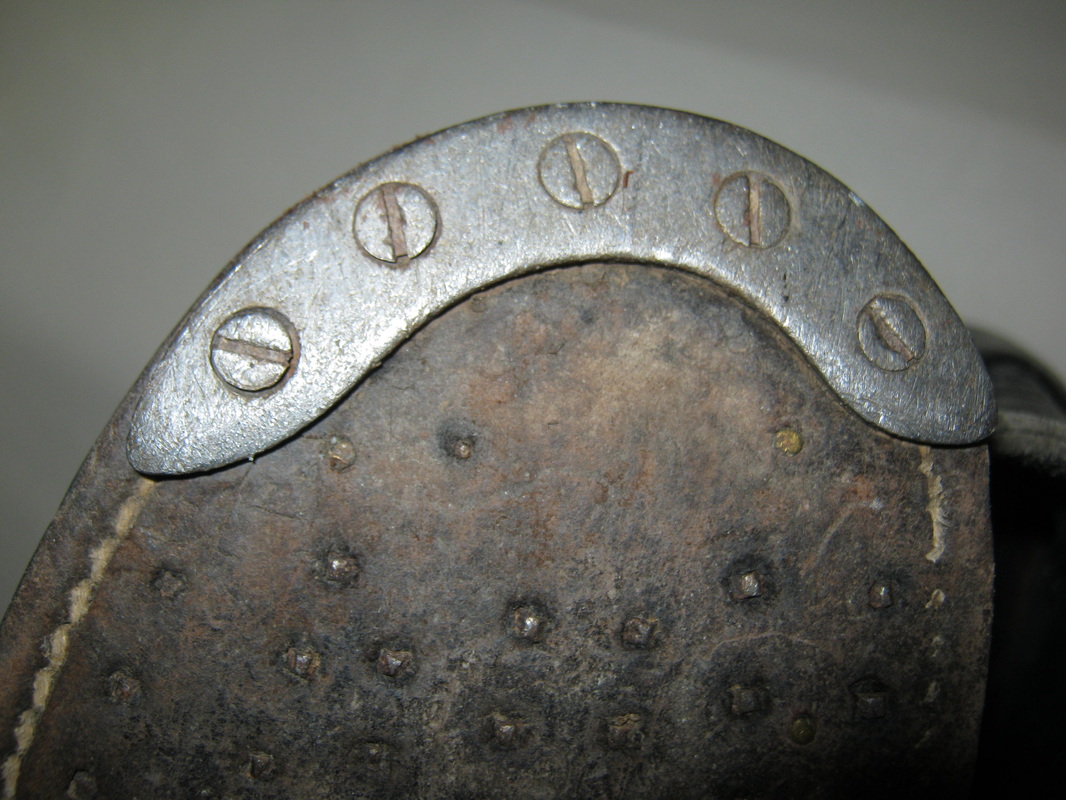
Boots
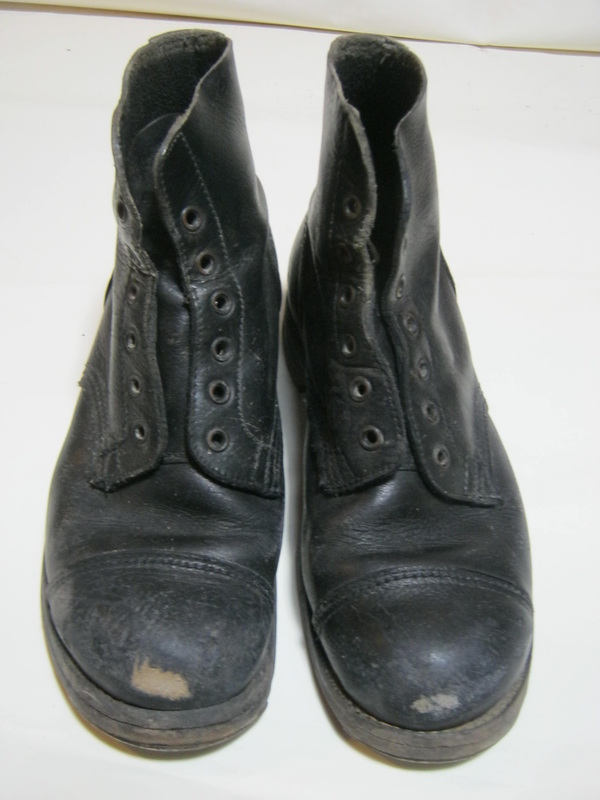
The British airborne forces wore low boots called "ammo boots" Below are photos of the details of an original pair of ammo boots. Any low ankle boot with a leather sole and cap toe is sufficient. If it looks like the boots below, it's good. What Price Glory stocks repro ammo boots for a competitive price to similar boots that are not ammo boots, so you want to take that into account when looking for boots. HOWEVER, boots with steel plates on the heels and toes make movement on armored vehicles hazardous, as you tend to slide with the metal on metal contact. Steel heel and toe plates also scrape the paint, which can begin the process of rust on antique vehicles. Vehicle crews who opt for a similar boot to the ammo boot with a plain leather sole or rubber sole will be commended. Ammo boot laces were rawhide laces, readily available wherever shoe and boot laces are sold.
|
|
|
|
Web Gear Basics
The below sequence shows the basic web gear arrangement as used by the infantry soldier. It also shows a few quick items to check for, to tell the difference between WW2 and post-WW2 web gear while you're searching, as well as what blanco is and how it is used.
|
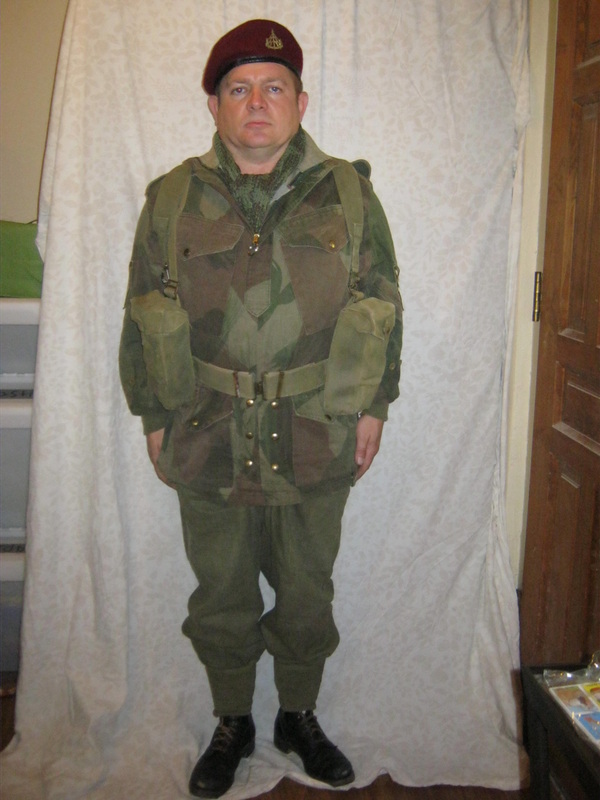
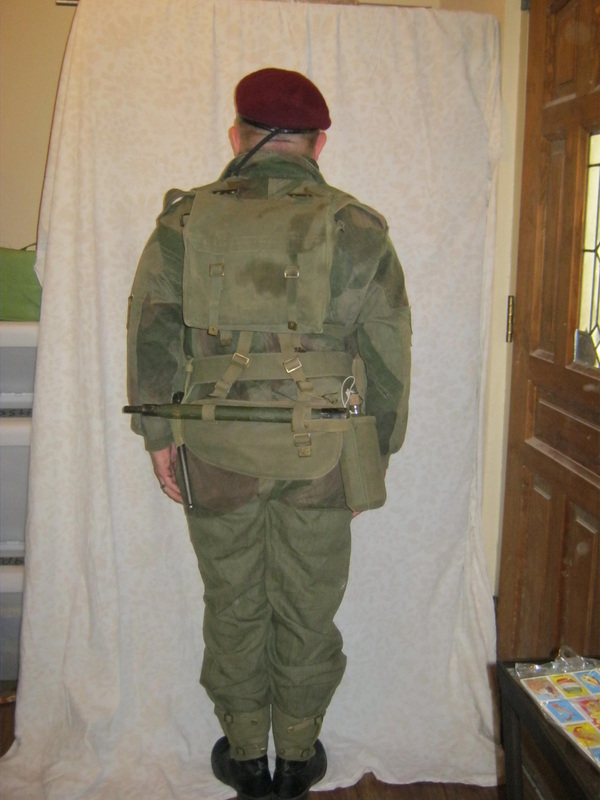
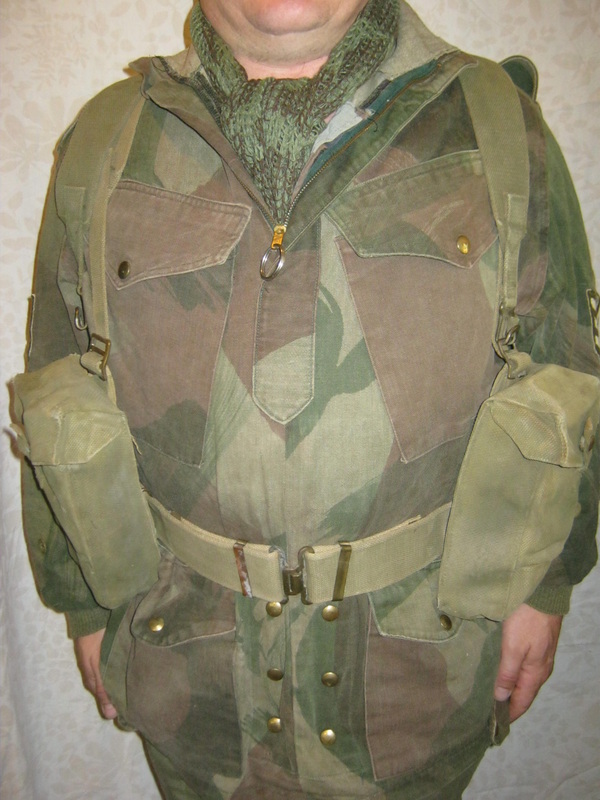
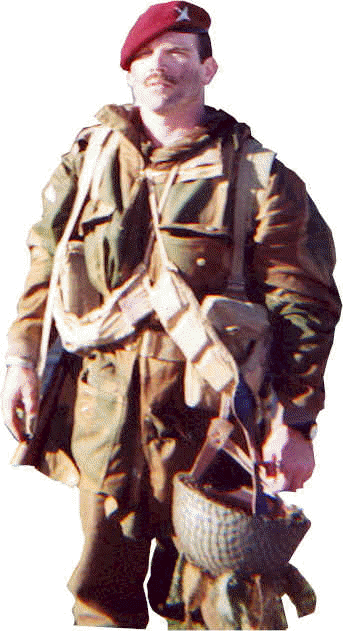
Here we see a tired, old, fat sergeant demonstrating the P37 web gear of a commonly equipped airborne soldier. This consists of belt, cross-braces, pair of basic pouches, canteen with carrier, bayonet with carrier, entrenching tool with carrier, small pack also known as a valise, and "L" straps for the small pack.
On his ankles he wears a pair of web gaiters, or anklets. To the left is a front view of the gear, and to the right the rear view of the gear. |
|

|
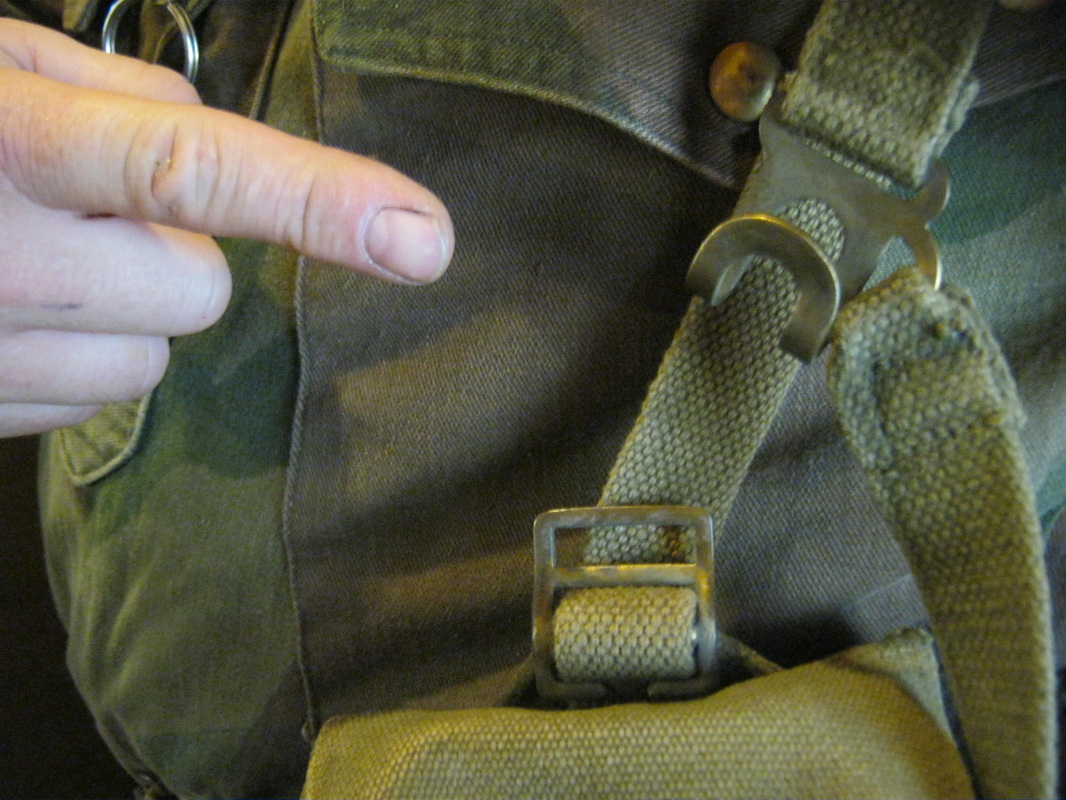
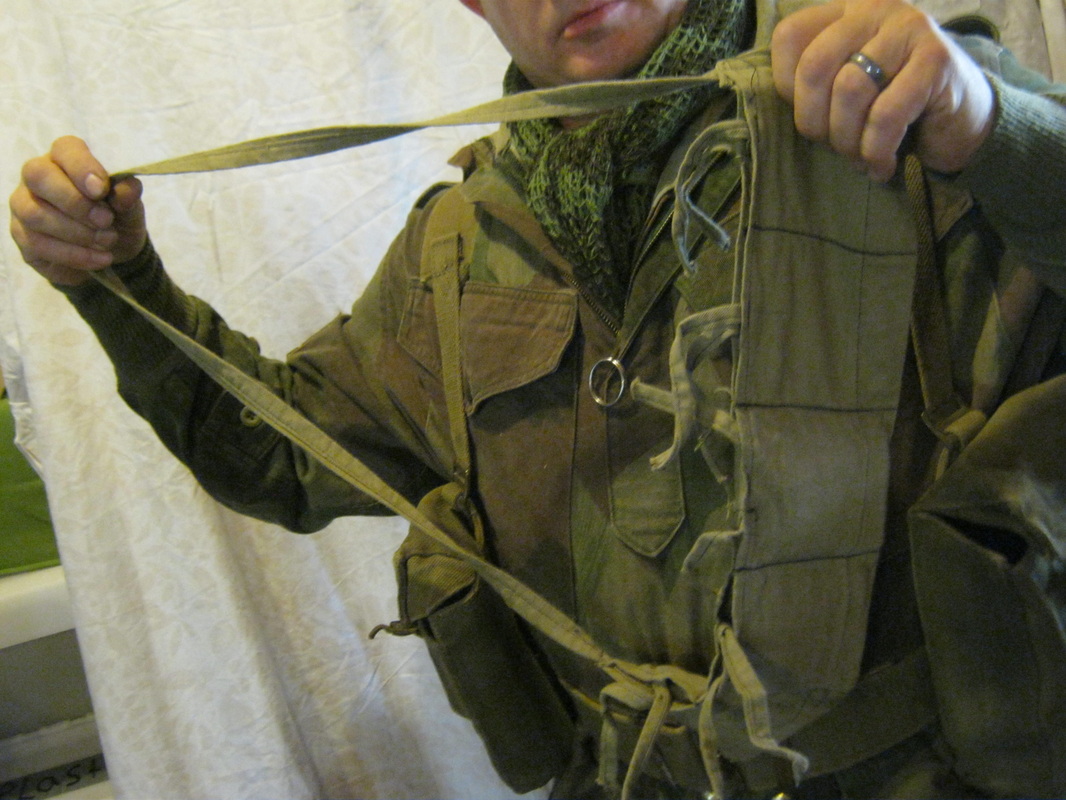
To the left is a close up of the small pack. The small pack was detachable, and held in place with a pair of hooks. To the right can be seen a close up view of the hooks that attach at the top of the buckles that hold the cross-braces to the basic pouches, worn on the front, attached to the waist belt.
|
|
|
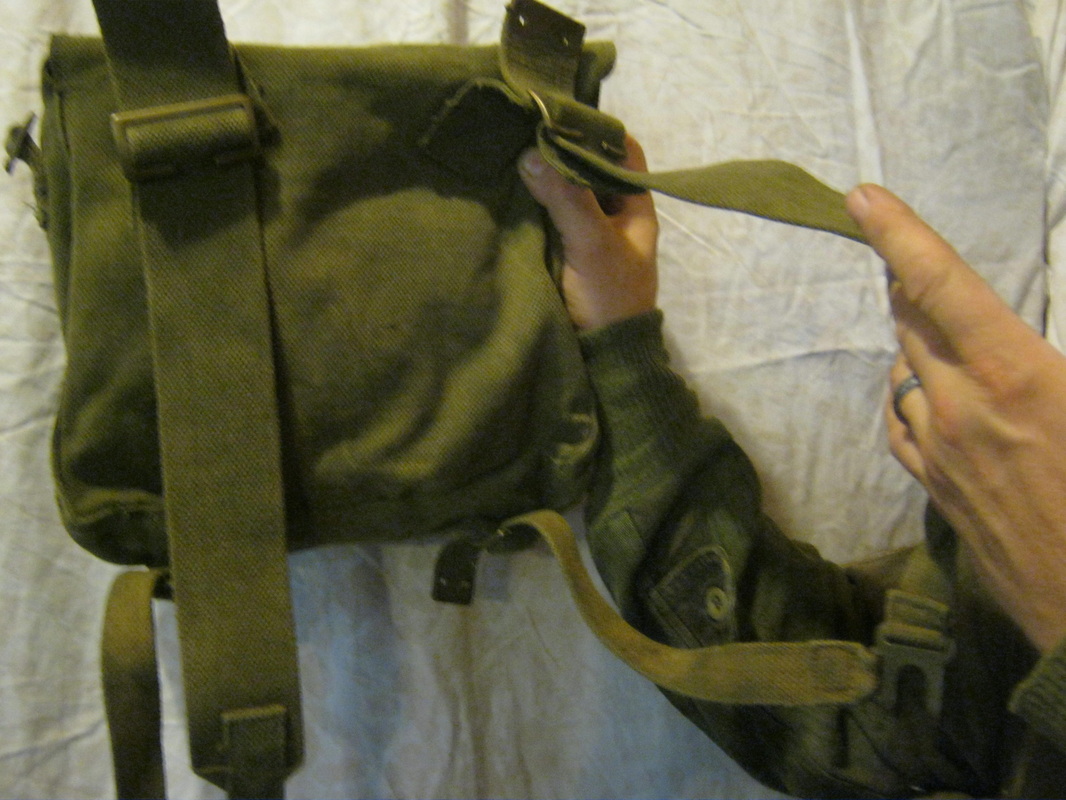
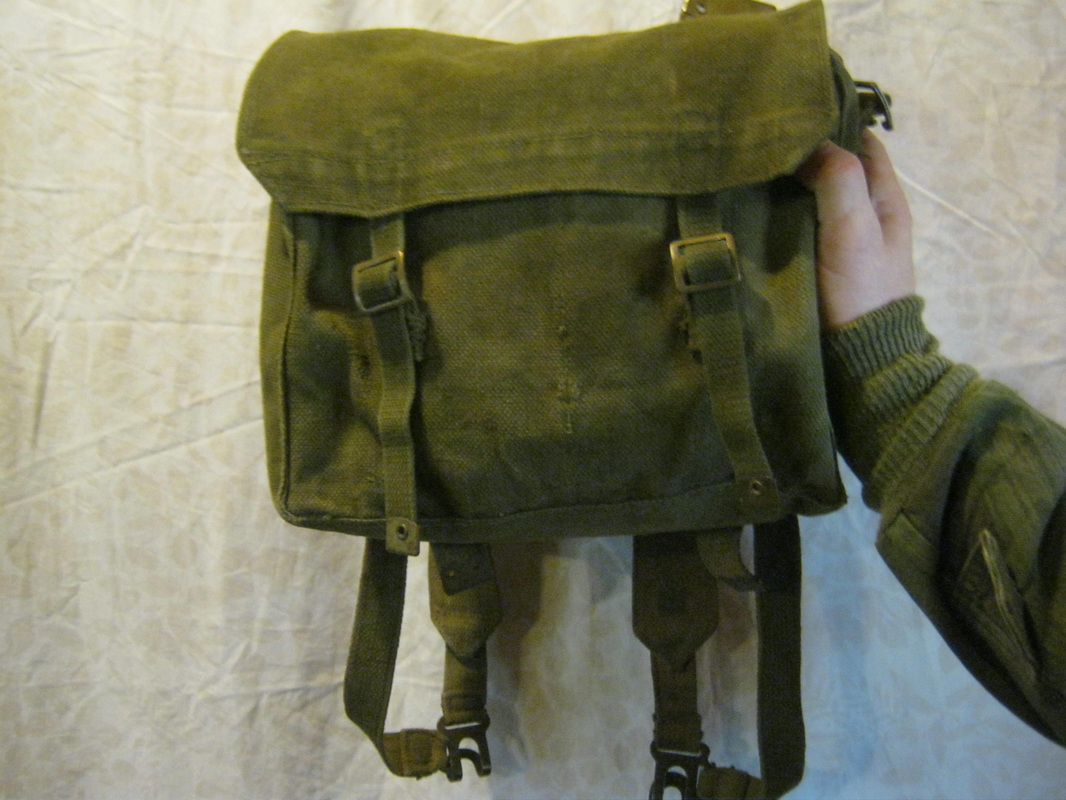
To the left is the small pack detached from the web harness. The L straps are attached to the pack by means of larg brass frame buckles at the top of the pack. To the right is the detail of the pack from the other side. The contents of a loaded pack will be described on another page of this website.
|
|
|
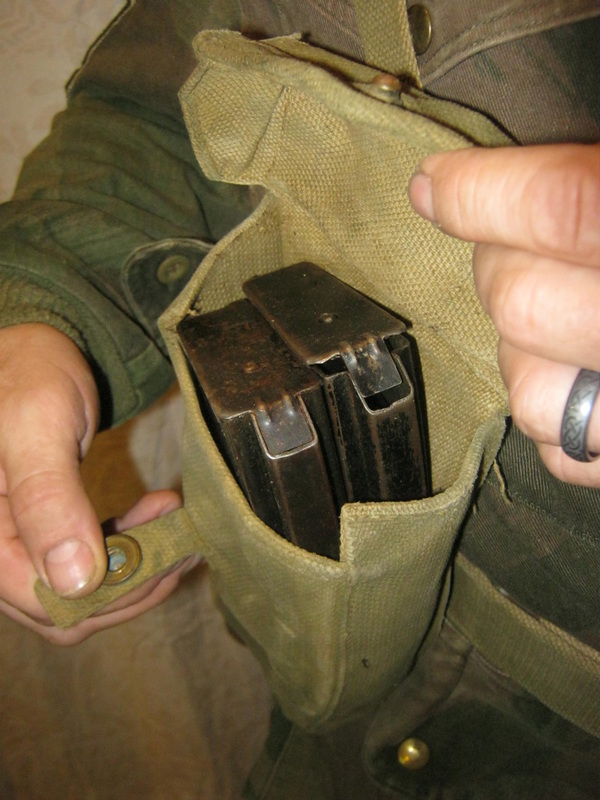
To the left can be seen the basic pouches attached to the belt, with the cross braces attached to the pouches.
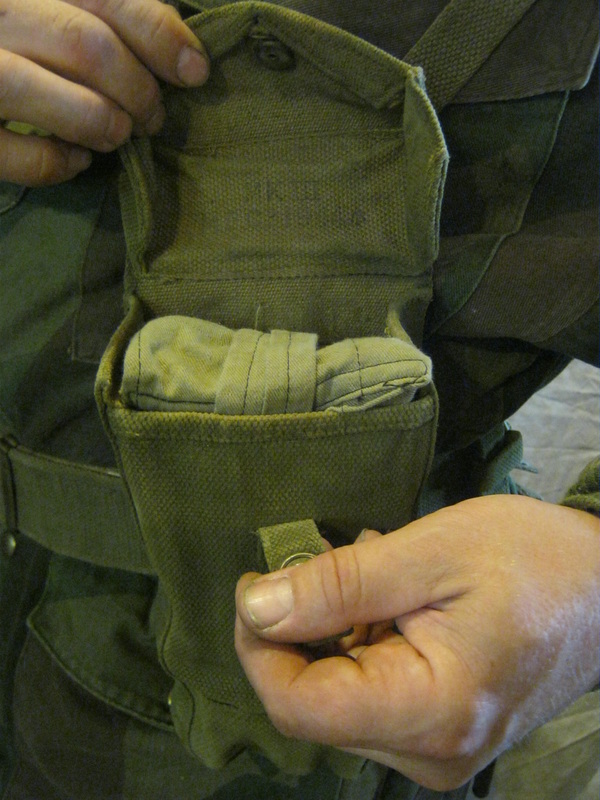
To the right, one of the pouches is opened, showing an ammunition bandoleer stowed inside. The basic pouch was designed so that it could carry rifle ammunition, grenades, 2" mortar rounds, and bren gun magazines. Normally, a soldier's load would carry a mix of rifle ammunition, hand grenades and bren gun magazines. The pouches are worn wide. Landing on them worn close is like falling on a concrete block. |
|
|
To the left is the bandoleer removed from the pouch. The bandoleer can be slung over the shoulder, and has 5 pockets. Each pocket holds two 5 round stripper clips, shown at right. The bandoleer holds a total of 50 rounds of ammunition.
|

|
|
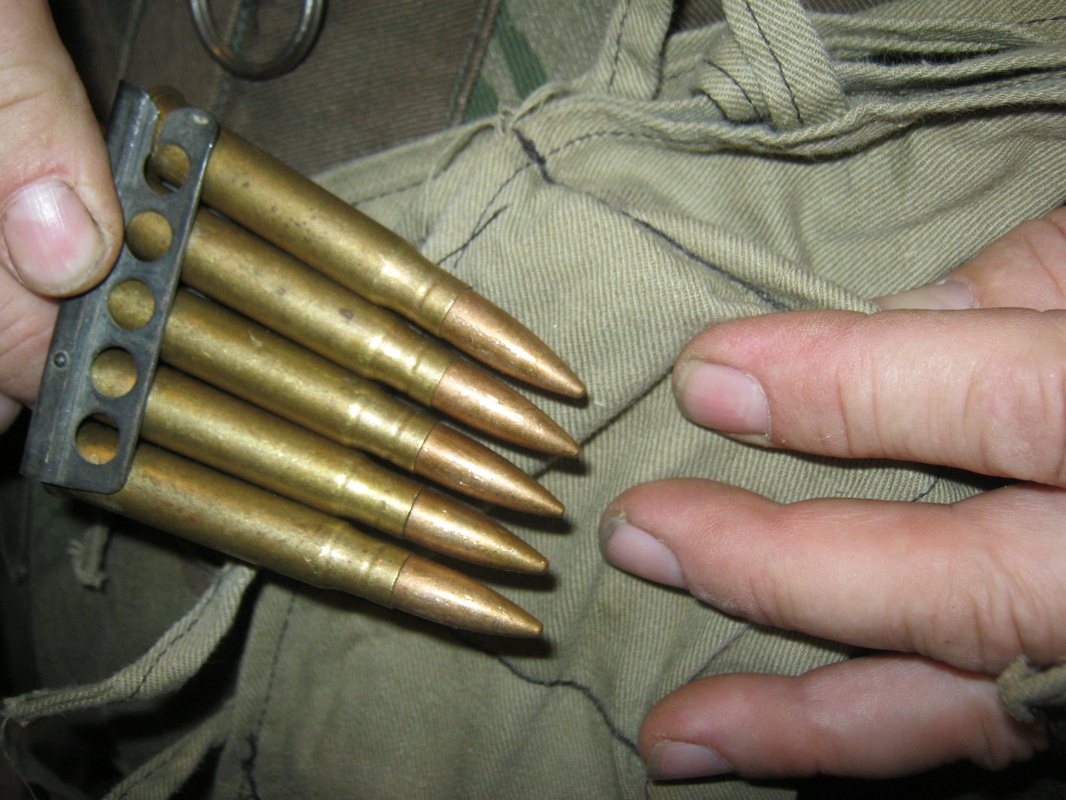
To the left is shown the stripper of ammunition removed from the pocket of the bandoleer.
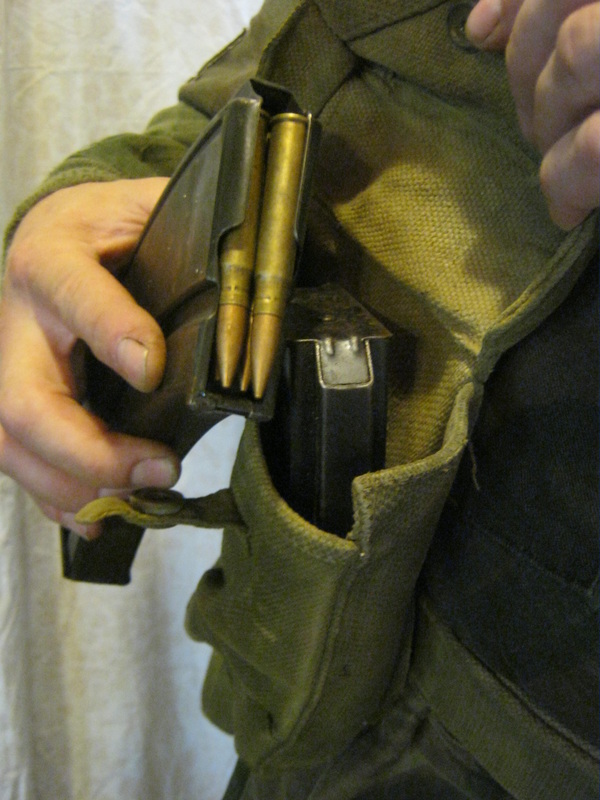
To the right is shown the soldier's other basic pouch opened, holding two bren gun magazines loaded with thirty rounds of ammunition each. And I just noticed I have to fix that floor plate on the inner magazine. Soldiers were given magazines for the bren to carry, and as the bren gunner expended ammunition, the other soldiers in the squad would collect the emply magazines and supply him with loaded ones. They would then reload them to keep the bren in operation. |
|
|
To the left is the bren magazine removed from the pouch, showing the ammunition inside. Care had to be taken to ensure that the rims of the cartridges overlapped from top to bottom to prevent stoppages both to the bren gun, as well as the enfield rifle of the riflemen.
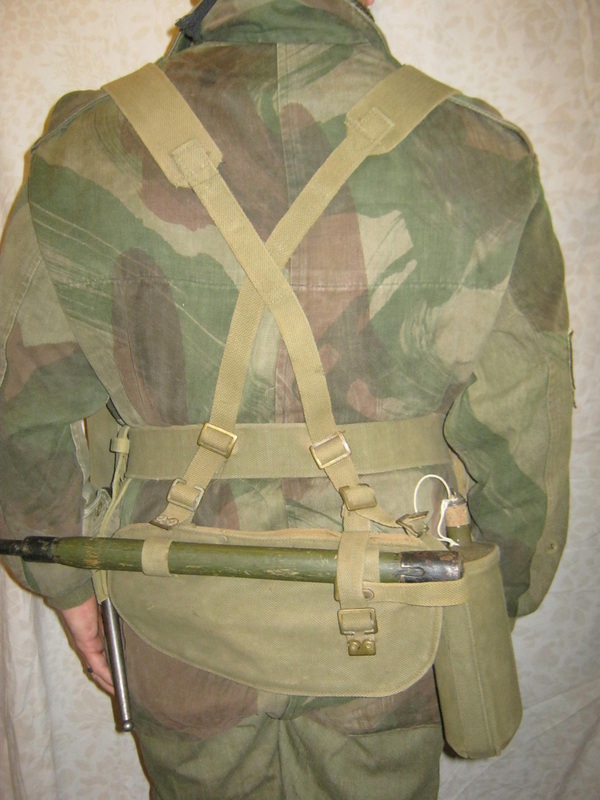
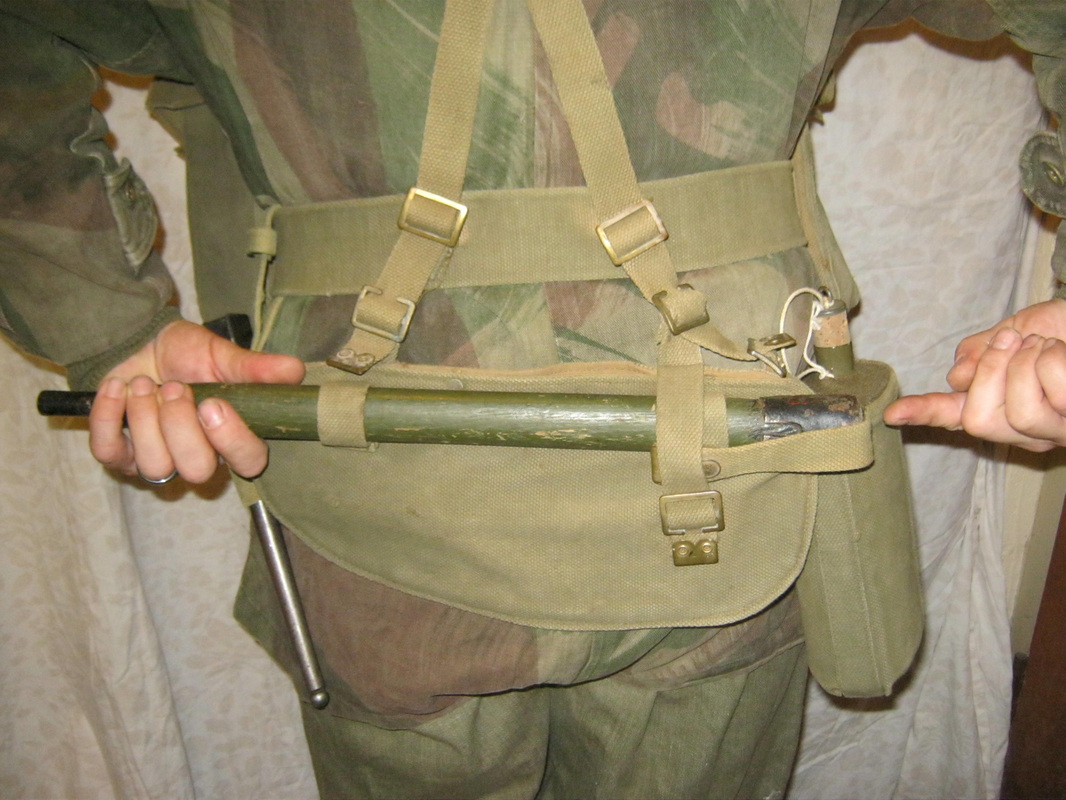
To the right is the web gear as seen from the rear with the small pack removed. Normally the soldiers of the assault squads within the recce troops of the 6th AARR would leave their small packs inside their vehicles. |
|
|
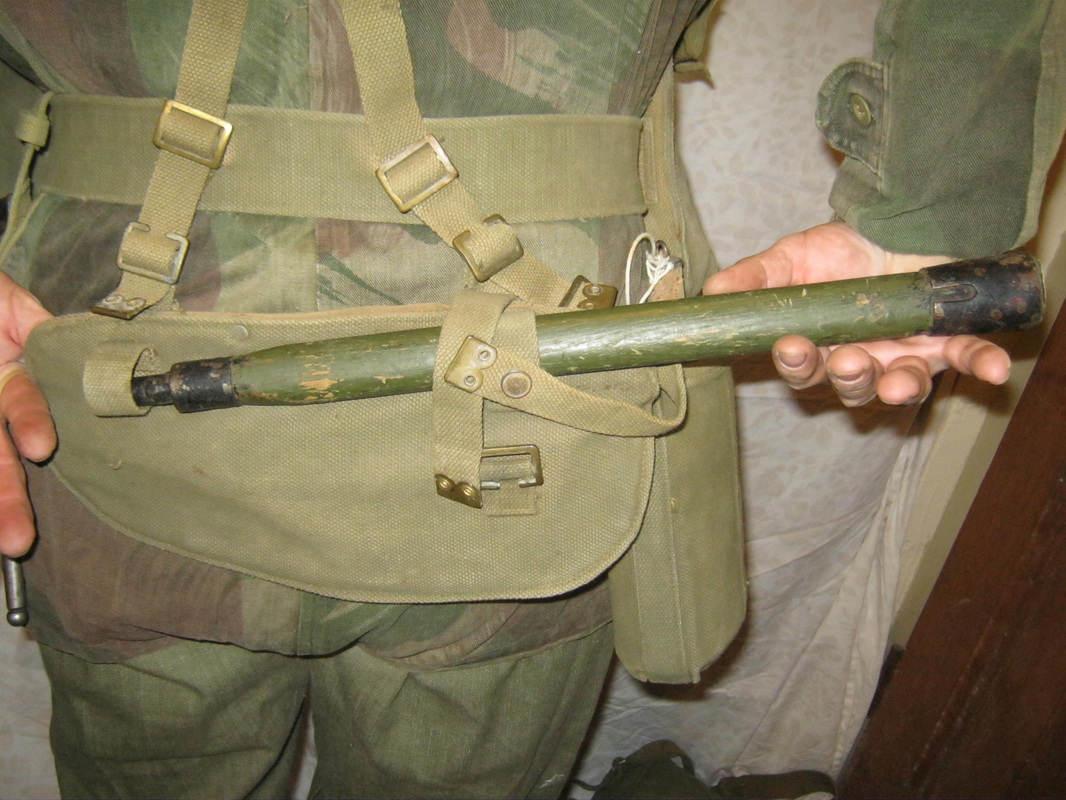
To the left is the entrenching tool stowed in its carrier. The handle, or helve, is seen slid into the horizontal loops on the pouch that holds the head. There is a strap on the right side as seen in the photo that helps to keep the helve from sliding out of the loops.
To the right is the bayonet in the bayonet frog that loops over the belt. The stud is pushed through a hole that is actually intended for a small strap that is supposed to keep the scabbard from sliding out of the frog. This method is more secure. |

|
|
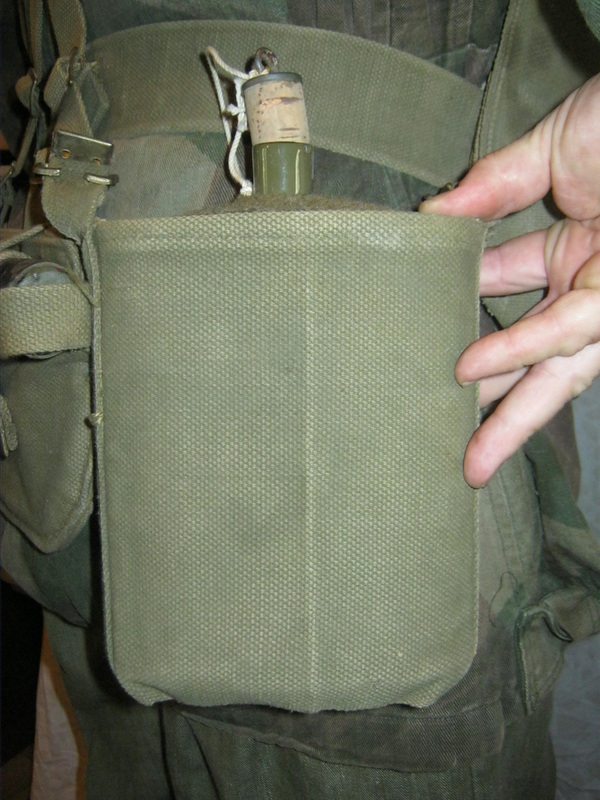
To the left is the canteen in the sleeve carrier. There is another type of carrier, made of web straps sewn into a harness, called the skeleton carrier. Although both are seen in photos of airborne soldiers, this pattern is the most common.
To the right is the entrenching tool helve being removed from the carrier. |
|
|
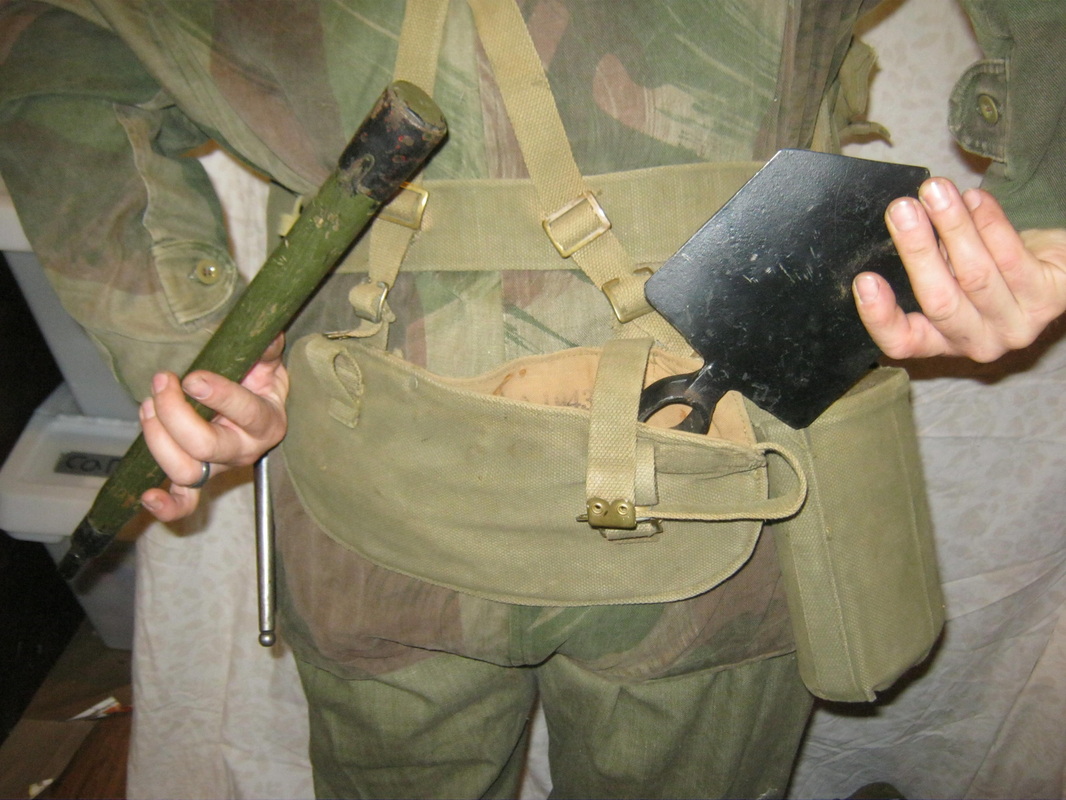
To the left is the head of the entrenching tool being removed from the carrier. The pocket is held closed by the verticle strap that can be seen overlapping the right side loop for the helve.
To the right is the entrenching tool assembled by sliding the head up over the helve. In this position it is used for digging. |
|

|
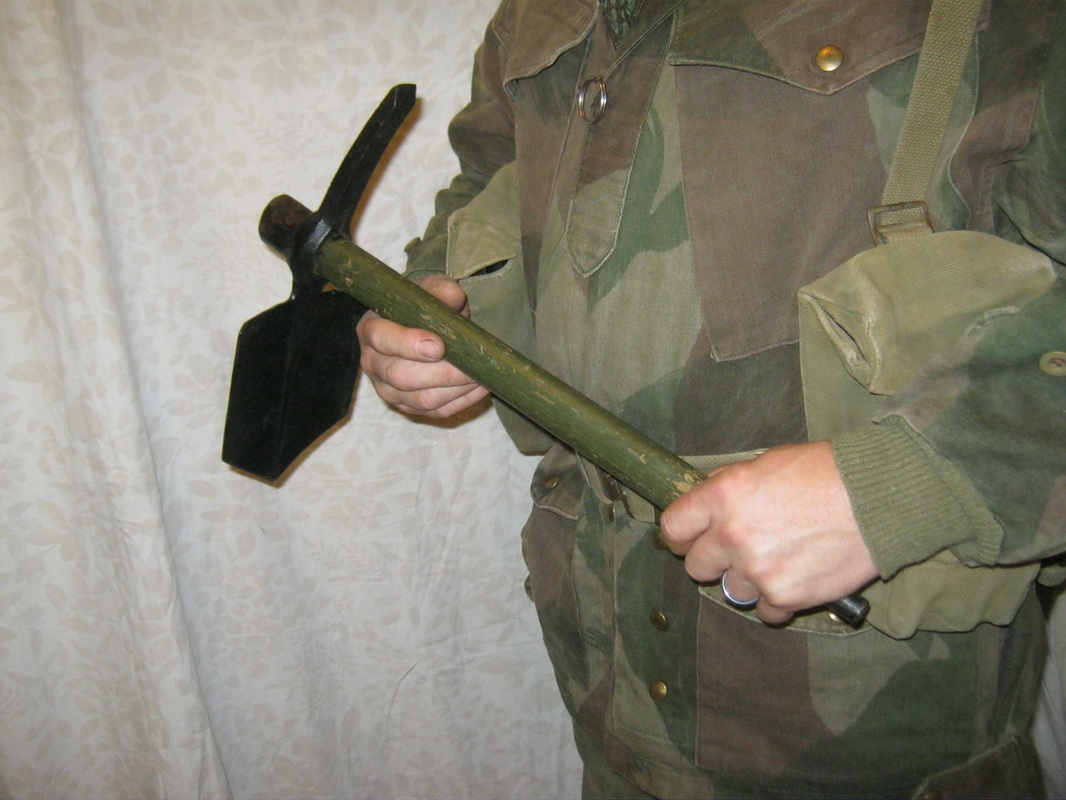
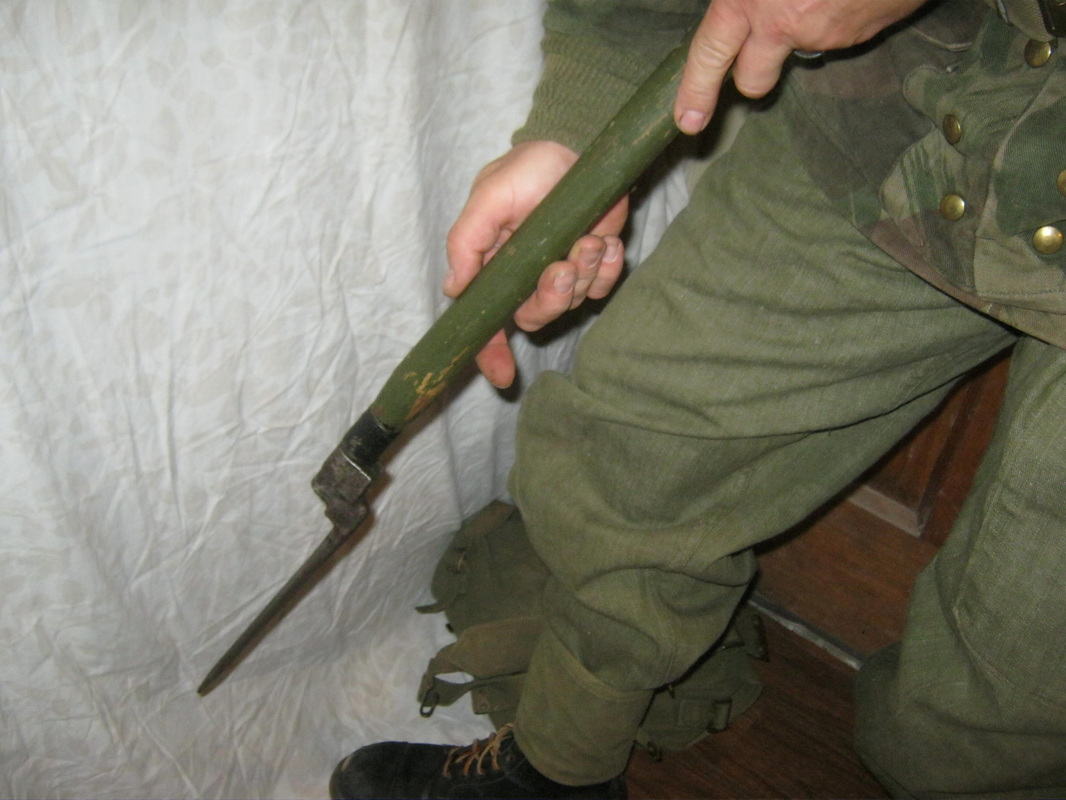
To the left is the entrenching tool turned around to be used as a pick to break up hard soil. The pick side of the head has a flat chisel-cut point to facilitate breaking up hard ground.
To the right, the bayonet is about to be attached to the entrenching tool helve. Assembled together, the bayonet and helve form a mine prod or probe. |
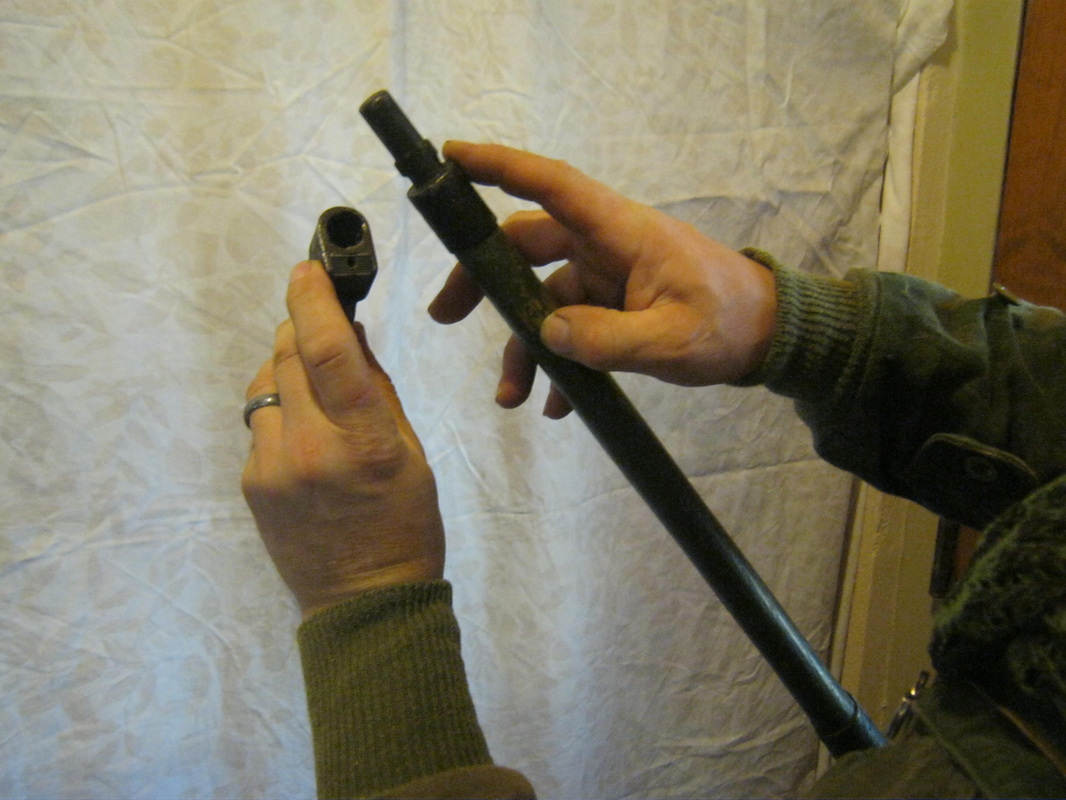
|
|
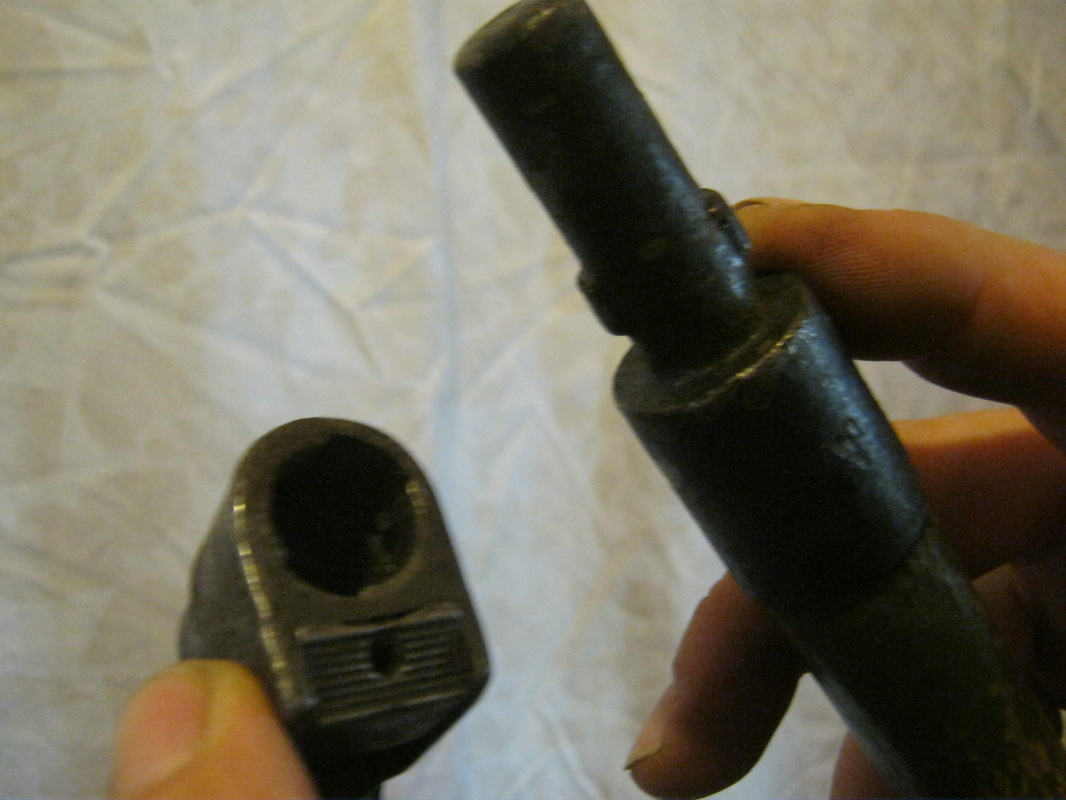
To the left can be seen up close how the fitting on the helve is shaped in the same manner as the muzzle of the rifle. The lugs on the helve fit into the key-ways in the bayonet, and the bayonet is then twisted to lock onto the helve.
To the right the assembled bayonet prod is seen as it would be employed probing for mines. |
|
|
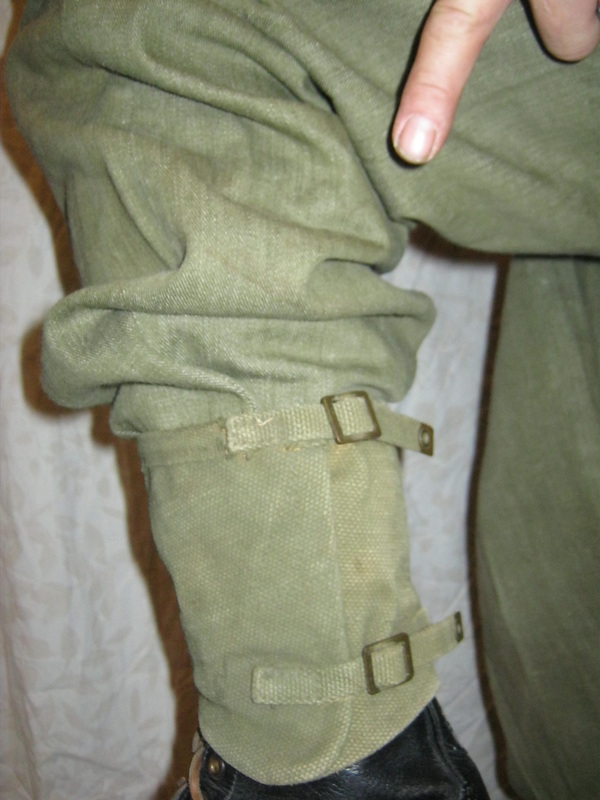
To the left is the last item of the basic webbing, the gaitors, also known as anklets. These keep unwanted items such as insects and pebbles out of the boots and trousers.
To the right can be seen two small packs. The pack on left is a post war pack, as can quickly be identified by the black painted buckles. This also shows the un-blancoed natural color of the web gear as issued. The pack to the right is war time issue, with brass buckles and fittings. It has been blancoed, and would have been issued in the same color as the pack on the left. All webbing comes in this color on the left. |
|
|
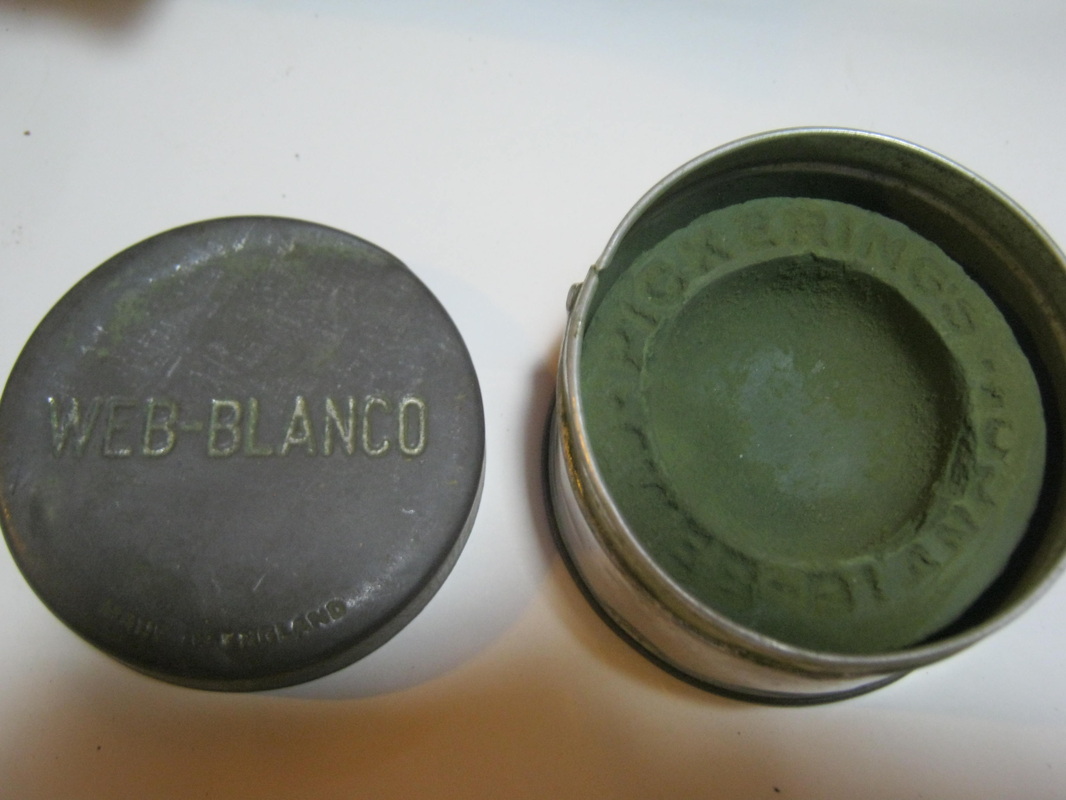
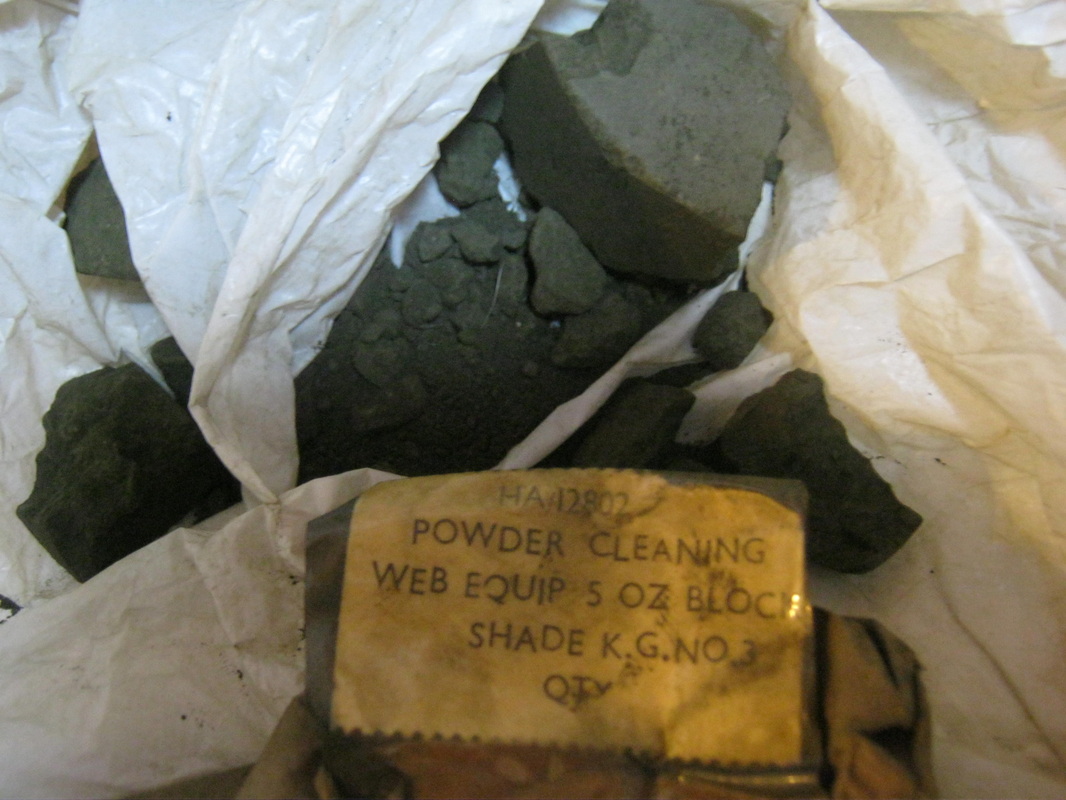
To the left is a blanco can, with a block of blanco inside. The soldier would carry a can of blanco with him in his pack. Blanco was for cleaning the webbing as well as coloring it. A stiff brush is wetted with water and scrubbed onto the block, then used to 'paint' the webbing. To the right is a broken up block of blanco used on the gear on this page.
|
|
|
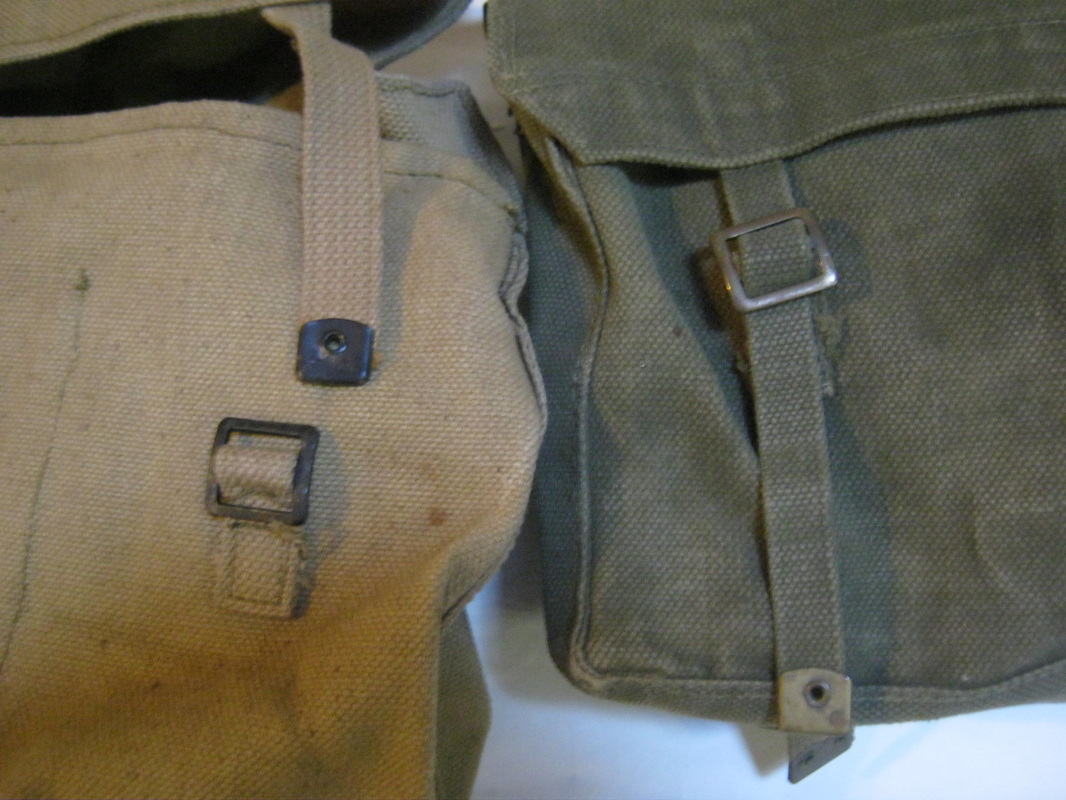
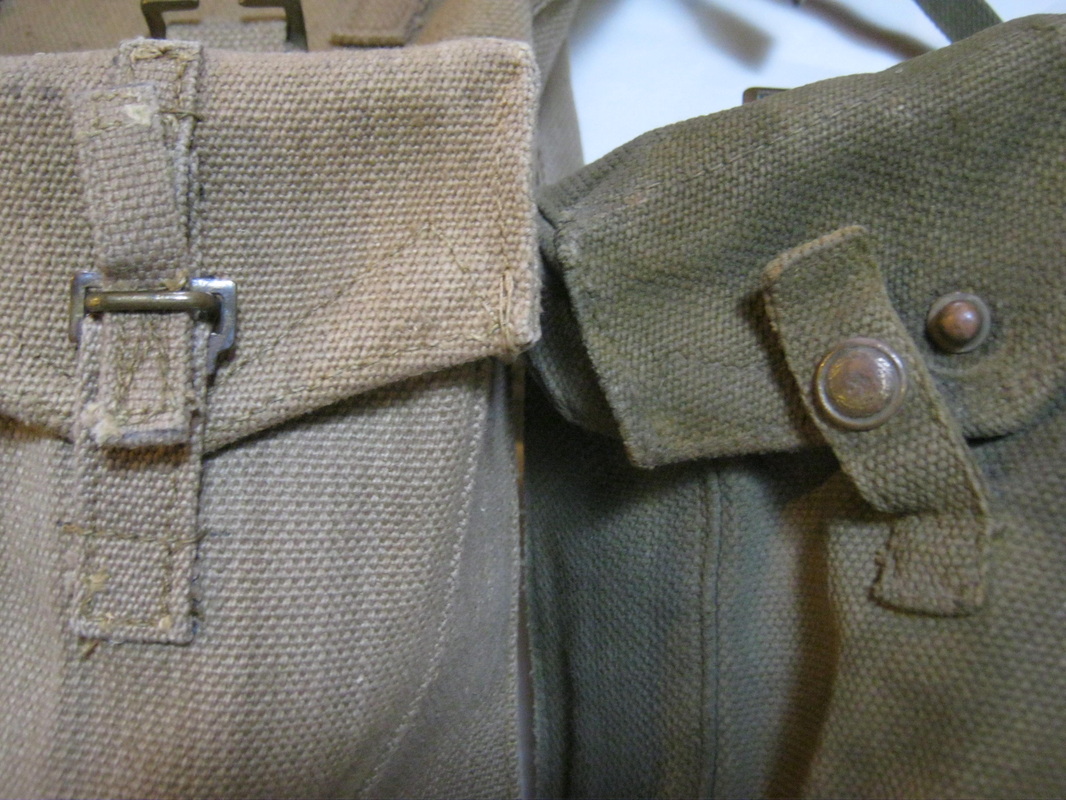
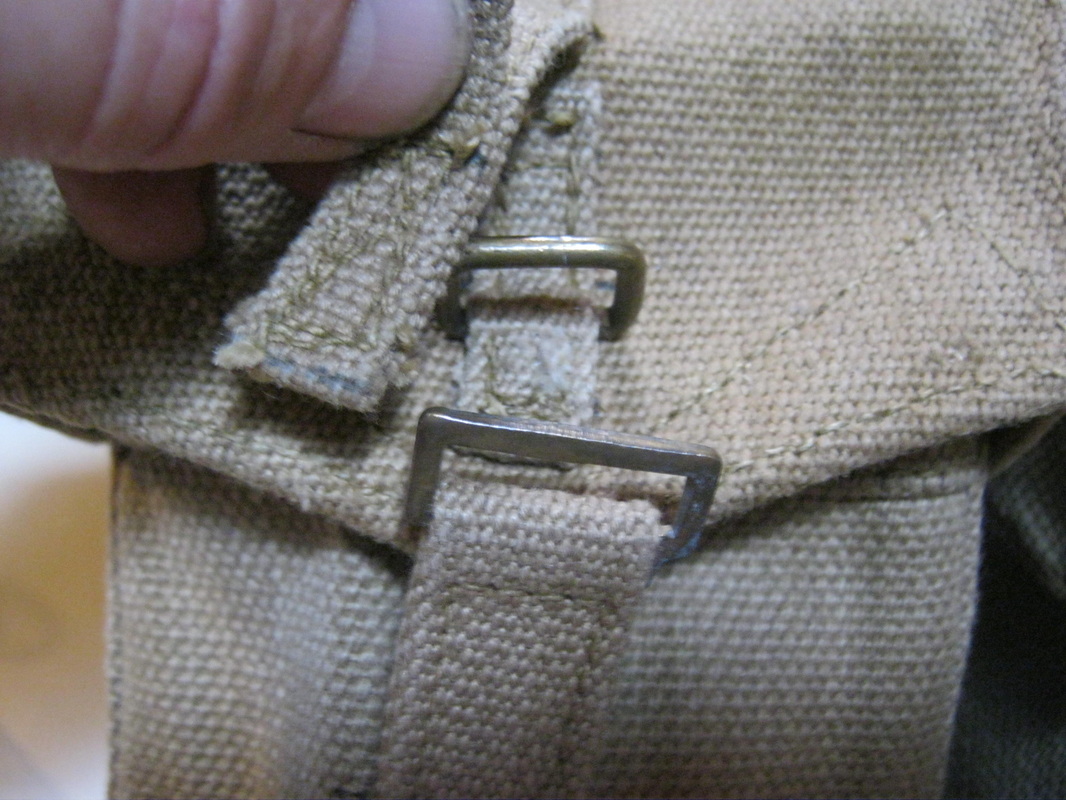
To the left is another comparison of a post war item to a wartime item. The left pouch is post war, with the new "quick release" closure arrangement that consisted of two metal rings and a web pull tab. The right-hand pouch to the left is a war time pouch, with "press the dot" fastening closure. To the right is the detail. Make sure you only get war time pattern gear.
|
|
Putting together a British Airborne soldier basic impression How hard is it to find the uniform and all the gear to portray a British Airborne soldier? Well, in the old days, it took a while and you had to look all over the place to find it. Today, you can get a "package deal" from www.onlinemilitaria.net
and it will cost you $555.00 plus shipping to fall in with the club. You can then go to www.imausa.com and for $79.95 plus shipping, get the helmet to go with the uniform and gear. For a better looking impression with a better camo smock, get the uniform and gear from onlinemilitaria.net, the IMA helmet, and go with Military Tour's 1st Pattern Dennison Smock at http://www.militarytour.com/Reproductions/WW11/CdnBritish/brit_cdnrepo.htm
|
British Para Package
P-37 Battledress Jacket (201098) P-37 Battledress Trouser (201109) Collarless Wool shirt (201184) Para beret (201443) with reproduction Parachute Regiment badge (201465) Denison Smock(202318) Ammo Boots (201485) Anklets (201527) P-37 Skeleton Web Set: - P-37 Web Belt Reproduction (204738) - UK Braces Original (201387) - UK Ammo Pouches x 2 (201375) - Water bottle Original (201380) - Water bottle Cover (201381) - Water bottle Cork (201068) - Water bottle Carrier (204093) UK P-37 Khaki Web Bayonet Frog - Reproduction (204375) Emergency Ration Tin (200977) First Field Dressing, Australian made (201411) Shell Dressing, Australian made (201413) Trouser Braces (201207) Toggle Rope (201970) Gammon Bomb (100648) Hawkins Mine (100647) A strategy to get the best setup would be to get the package deal from onlinemilitaria.net, sell the smock for $100.00 on ebay, and then use the $100 toward the purchase of one of Military Tour's first pattern smocks.
Or, you can take your time, save some money, and look for deals on used uniforms and gear, convert items from post war or other armies to conform to wartime british standards, etc. One of the best places to look for good deals is ebay. There are many uniforms and gear dealers on the internet. Go search! |
|
Improving the What Price Glory (online
|
|
Putting together a British Armoured Fighting Vehicle crewman impression
Putting together a uniform and gear for an armoured vehicle crewman is not quite as simple as getting a package deal with almost everything you need in one purchase. The tank, carrier, or scout car crews had the basic P37 Battledress Uniform like everyone else. Photos show armoured crews sometimes wearing Dennison smocks. They also wore denim tank coveralls, and in the winter of 44 through the rest of the war, the RAC tank suits. The RAC tank helmet was issued to the crews, which looks similar to the airborne helmet, but has a different liner and chin strap. Crews wore the standard pistol belt, but were issued with revolvers, automatic pistols, sten guns or rifles depending on the type of vehicle they were on, and depending on their job. If they had a handgun, they were issued with a special holster for armoured vehicle crews. There was an early version with a long strap with the holster worn low on the thigh, and a later version with the holster worn close to the hip. If the crewman's personal weapon were a sten or enfield, they'd be issued with the appropriate webbing for that weapon. Although crews were issued with web packs and water bottles, they wouldn't be attached to their web harness in the manner of the infantry. Water bottles would be stowed in the vehicle, packs stowed inside or on the outside of the vehicle, etc.
Until December 1944, normally on campaign the crews would be wearing battledress or denim coveralls. Currently, there is only one vendor offering denim coveralls, located in India. There is no regular source for obtaining the RAC tank suit. They can be found on occasion from various sources on the internet, such as collectable militaria dealers and Ebay. The price for one of these suits depends on the size, condition, and country of the seller. Generally, they can be had for between $100.00 and $200.00.
Notwithstanding what position you hold on which vehicle, as a crew member, a typical setup would require a set of battledress, or battle dress trousers and denisson smock, or tank coveralls, with a pistol belt, holster, ammo pouch and cross braces for basic webbing. Maroon Beret with badge and RAC helmet for headgear, and ammo boots for foot gear, with leggings if you are wearing battledress trousers. Water bottle with carrier and pack would be needed, and stowed on the vehicle.
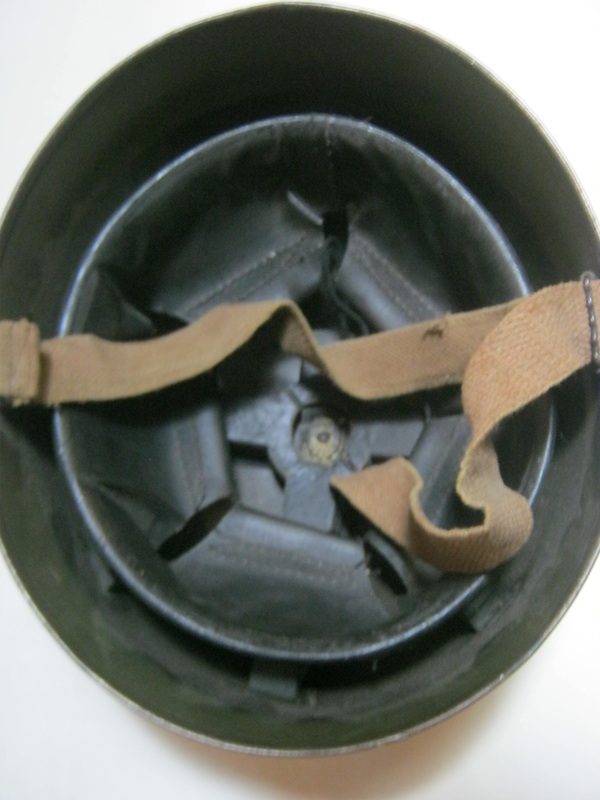
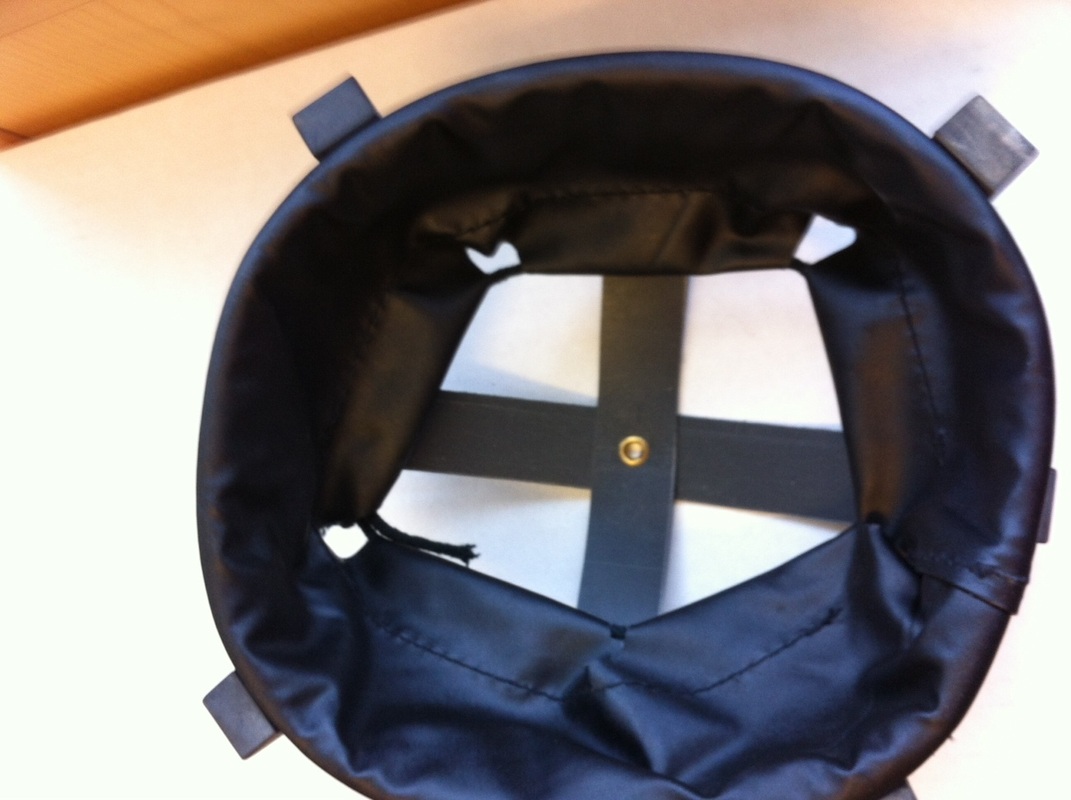
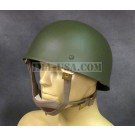
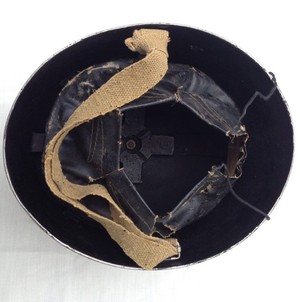
RAC Helmet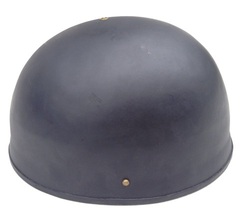
At left is the Royal Armoured Corps helmet, worn by armoured fighting vehicle crews.
To the right is a shot of the inside of the helmet to the left. Note the web chinstrap instead of the leather or web harness used in the para helmet, and the brodie-style liner. |
|
|
|
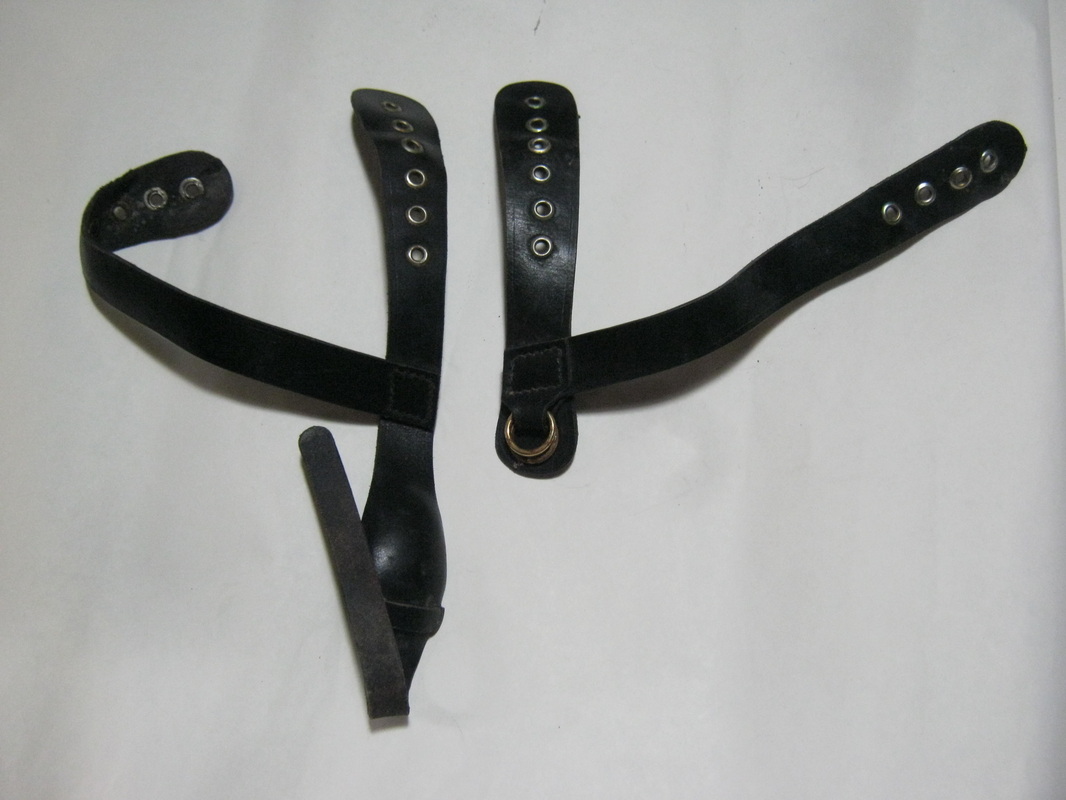
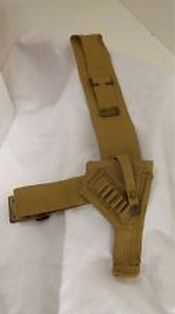
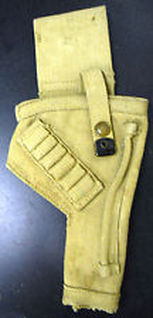
Tanker HolstersTo the far left is the first model of the tanker holster. It was fitted with an adjustable hanger strap looped over the belt, which could be adjusted for the length needed depending on the height of the wearer. It also had a strap to hold it firm to the leg.
Problems arose with the holster gettting caught on equipment inside the tank, so crews started cutting the strap short so the holster could be worn on the hip. Accordingly, a second model holster was developed which did away with the leg arrangement all together, and this new model holster is seen to the near right. |
|
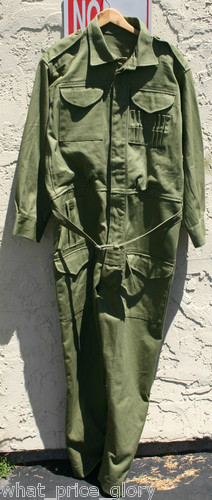
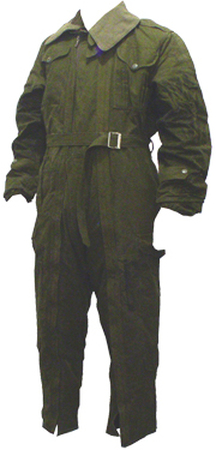
Coveralls and Pixie SuitsTo the left is a set of tankers' denim coveralls. There are variations of these, but this is basically the standard type.
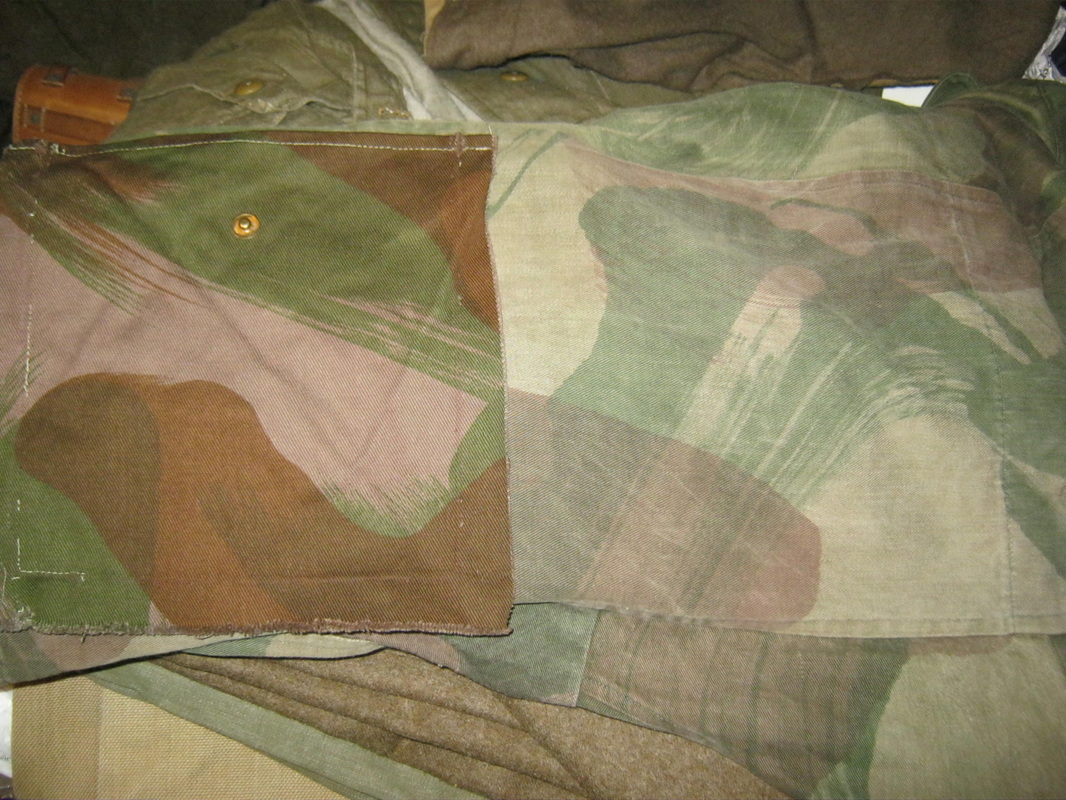
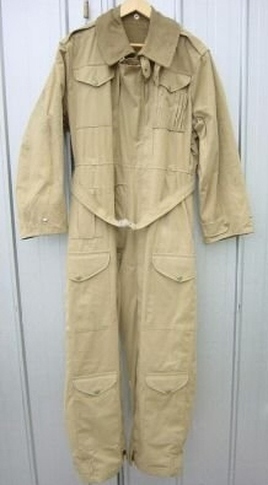
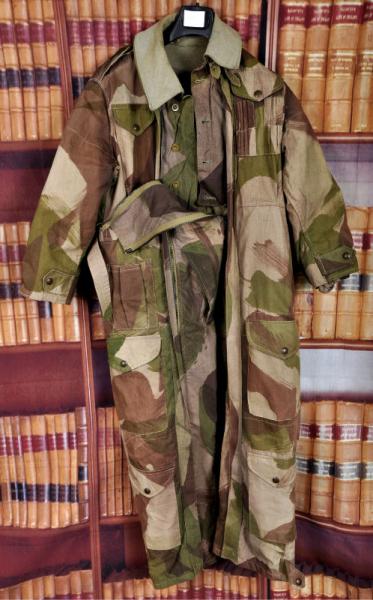
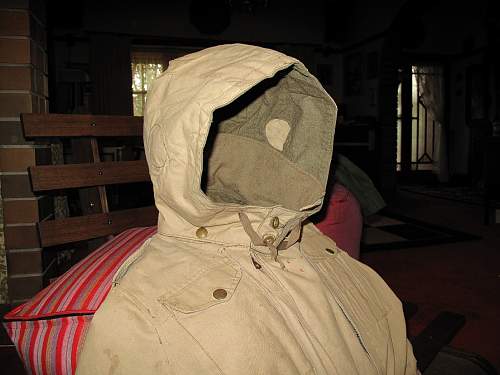
To the right is the Royal Armoured Corps Tank Suit, or as it was commonly called, the "Pixie Suit". To the bottom right is the hood that was issued with the pixies suit, seen attached and in the worn position. To the bottom left is the camouflaged version of the Pixie suit. Although thousands of them were made from 1944 on, the camo pixie is not seen in photos from the campaign in northwest Europe. It is presumed that they were probably going to be issued out for the In the event, that didn't happen, and the camo pixie is generally associated with British crews serving during the Korean War. To the bottom center is a post-WW2 Belgian pixie suit. It is a direct copy of the WW2 british pixie, with the main difference being that it is in olive green material, not tan. Unfortunately, although they generally run cheaper, the color is wrong, and attempts to bleach one out to re-dye it tan proved futile. The only noticable difference between WW2 british tan pixies and post war tan pixies is that the post war press the dot buttons are painted light green. |
|
|
|
|
Links
Link to Collecting British WW2 airborne militaria website.
http://home.tiscali.nl/nijsten/index.html
Link to 6th June 1944 . com website. Source for cap badges, shoulder titles (including Light Tank Squadron and Reconnaissance Corp), rank insignia, airborne patches, etc.
http://www.6thjune1944.com/index2.html
http://home.tiscali.nl/nijsten/index.html
Link to 6th June 1944 . com website. Source for cap badges, shoulder titles (including Light Tank Squadron and Reconnaissance Corp), rank insignia, airborne patches, etc.
http://www.6thjune1944.com/index2.html
